20 Instant Pot Dinners: 30-Minute Pressure Cooker Meals for Beginners
The five buttons that matter, the three rules that prevent every beginner failure, and 20 dinners worth pressure-cooking.
An Instant Pot dinner is realistically 30 to 45 minutes door-to-table — about 10 minutes to come to pressure, 8 to 25 under pressure, and a few minutes to release — and almost all of it is unattended. The pressure-cooker dinners below are the ones worth starting with, plus the handful of rules that stop a beginner's first three dinners from going wrong.
Get a free week of Instant Pot dinners
Seven pressure-cooker dinners, one consolidated shopping list, sent Sunday. Every recipe one tap from an Instacart cart.
No spam, unsubscribe in one click. Recipes, shopping lists and Instacart carts all work without an account either way.
Why the Instant Pot is the best beginner appliance
A pressure cooker raises the boiling point of water from 212°F to roughly 250°F, which cuts braise times by 60-70%. A pot roast that takes three hours in the oven takes 50 minutes. Dried beans that need an overnight soak plus 90 minutes cook in 35 with no soak at all. Stock that simmers all day is done in two hours and tastes better.
The reason it's the beginner's appliance specifically is that it's forgiving in the ways beginners need. It doesn't scorch when you walk away, it doesn't require you to judge a simmer, and it's nearly impossible to dry out a braise. Pressure cooking has been around since the 17th century, but the Instant Pot's microprocessor-controlled lid lock and pressure regulation removed the risk that made stovetop pressure cookers intimidating.
It is not fast at everything. Anything that needs browning, crisping, or reduction still needs a pan or an oven. Use it for braises, beans, grains, soups, stews, and tough cuts — not for chicken breasts, delicate fish, or anything you want crusty.
The five buttons that matter
| Button | What it actually does | Use it for |
|---|---|---|
| Pressure Cook / Manual | Cooks at high pressure for a set time | 90% of everything |
| Sauté | Runs the base as a burner, lid off | Browning meat, blooming spices, reducing sauce |
| Keep Warm | Holds ~145-172°F after cooking | Dinner that has to wait |
| Cancel | Stops the current program | Between stages |
| Pressure Level (High/Low) | Switches 10-12 psi vs 5-7 psi | Low for delicate items like eggs, fish |
The rest — Meat/Stew, Soup, Bean/Chili, Rice, Poultry — are just presets that set a time and pressure for you. They aren't smarter than the recipe you're reading. Learn Pressure Cook and Sauté and you can ignore the entire rest of the panel forever.
Sauté is the underrated one. Browning meat in the pot before pressure cooking builds the Maillard flavor that a sealed, wet environment cannot create. It costs five minutes and it's the single biggest quality difference between a bland pressure-cooker stew and a good one.
Three rules that prevent most beginner failures
1. Respect the liquid minimum. A 6-quart pot needs at least 1 cup of thin liquid to generate steam; an 8-quart needs 1½. "Thin" means water, stock, wine, or juice — not tomato sauce, coconut milk, or barbecue sauce, which are too thick to steam properly and will trigger a burn warning. Thick sauces go on top of the liquid, unstirred, or in after cooking.
2. Know your release. Quick release (flip the valve, steam blasts out in 1-2 minutes) is for anything that overcooks fast — vegetables, seafood, pasta, rice. Natural release (walk away 10-25 minutes while pressure drops on its own) is for meat, beans, and anything foamy or full of liquid, because a quick release on a full pot of soup sprays hot broth out the valve. Most recipes that say "natural release 10 minutes, then quick release the rest" mean exactly that.
3. Check the sealing ring. The silicone ring absorbs odors and stiffens over time. If your pot won't come to pressure, 90% of the time the ring is seated wrong, cracked, or missing. Keep a second ring and swap the savory one out for desserts — a chili-scented ring makes rice pudding taste like chili.
Chicken dinners you can put on repeat
Chicken thighs are the ideal pressure-cooker protein: 8-10 minutes at high pressure, and they stay juicy where breasts turn stringy.
- Instant Pot Caribbean chicken with mango-pineapple salsa — bright, fast, and a good shredded-chicken base for tacos or bowls.
- Instant Pot butter chicken with creamy tomato sauce — restaurant-grade in 30 minutes; add the cream after cooking.
- Instant Pot creamy mushroom chicken — a weeknight comfort dinner over noodles or rice.
- Instant Pot lemon-garlic chicken with herb quinoa — protein and grain in one pot.
- Instant Pot lemon herb chicken with garlic spinach — five ingredients, 25 minutes total.
- Instant Pot Thai basil chicken with coconut milk — coconut milk goes in after pressure so it doesn't scorch.
- Instant Pot coconut lemongrass chicken curry — a full curry with no simmering.
- Instant Pot chicken and mushroom soup with thyme — the from-scratch alternative to a can.
- Instant Pot teriyaki chicken with steamed rice — sauce and rice cook together.
Shredded chicken, memorized: 2 pounds boneless thighs, 1 cup stock or salsa, 10 minutes high pressure, 5-minute natural release. Shred in the pot with two forks. That single technique becomes tacos, enchilada filling, salads, and sandwiches for the week.
Beef and pork: the cuts that actually get better
Pressure cooking is at its best on collagen-heavy cuts — chuck roast, pork shoulder, short ribs, brisket. The collagen converts to gelatin in a fraction of the usual time, which is why a 50-minute pot roast tastes like a 4-hour one.
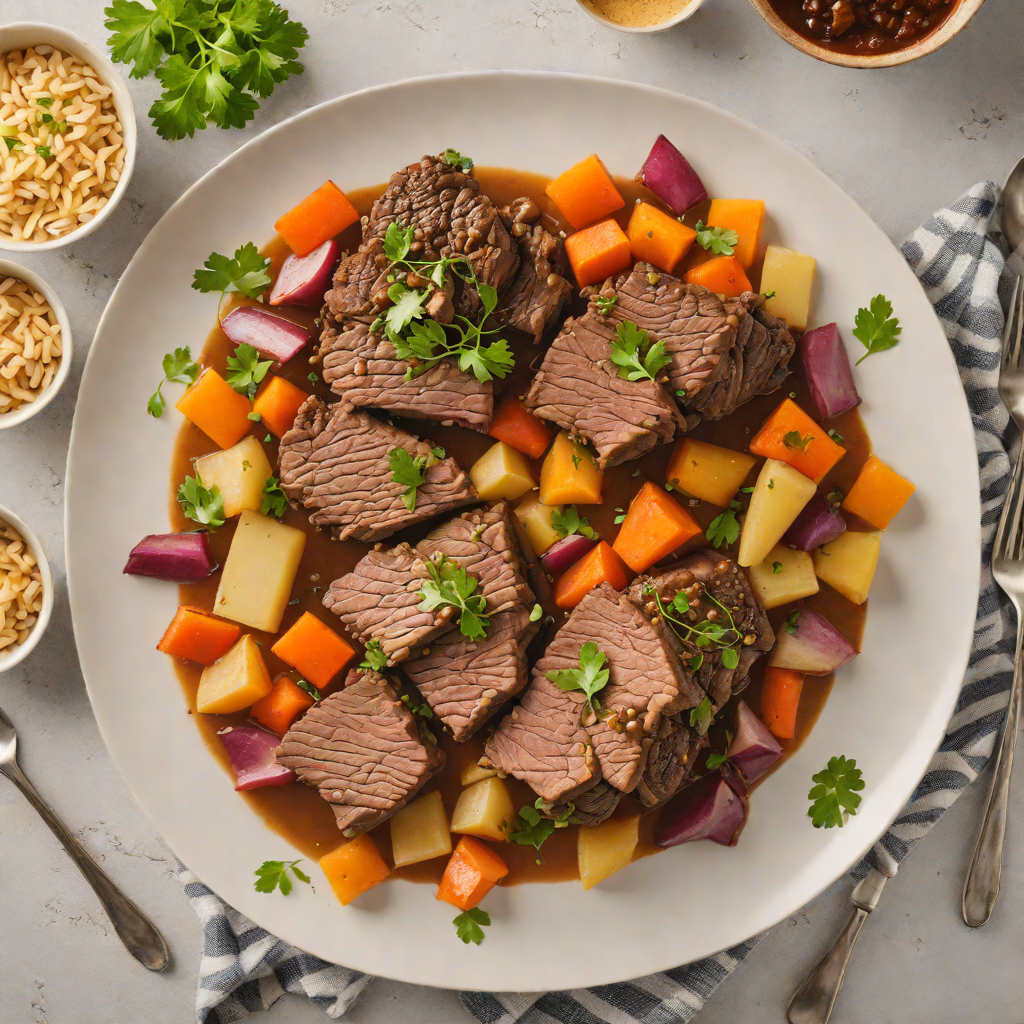
- Instant Pot braised beef with root vegetables — the classic pot roast, about 50 minutes at pressure.
- Instant Pot pork carnitas tacos with pickled onions — shoulder in 45 minutes; finish under the broiler for crisp edges.
- Instant Pot beef chili with black beans — dried beans and beef in one run, no soak.
- Instant Pot ground beef and vegetable chili — a faster ground-beef version.
- Instant Pot beef and barley stew with root vegetables — grain and meat cooked together.
- Instant Pot Korean-style beef bulgogi — sweet-savory, and excellent over rice.
- Instant Pot Korean-inspired spicy pork stew — gochujang-based and deeply warming.
- Honey-soy glazed Instant Pot pork tenderloin — tenderloin is lean, so this one runs short at 4 minutes.
- Instant Pot Brazilian beef stew with root vegetables — a one-pot Sunday dinner on a Tuesday.
The broiler finish is worth building into your habits. Carnitas, pulled pork, and short ribs come out of the pot tender but pale; five minutes under a hot broiler on a sheet pan gives you the crisped edges that make the dish. A sturdy sheet pan is the only extra equipment involved.
Rice, pasta, and grain bowls
Rice in a pressure cooker is close to foolproof once you accept a different ratio: 1:1 rice to water for white rice (not the 1:2 you'd use on a stove), 4 minutes at high pressure, 10-minute natural release.
- Instant Pot macaroni and cheese with cheddar and cream — pasta cooks in the pot, cheese stirs in after.
- Instant Pot Korean-inspired beef and rice bowl — meat and rice, pot-in-pot method.
- Instant Pot Korean-inspired spicy pork rice bowl — same technique, spicier.
- Instant Pot rustic vegetable and herb rice bowl — a meatless weeknight bowl.
- Instant Pot coconut rice pudding with cardamom and pistachios — dessert in 12 minutes.
Pasta rule: cook at half the box's stovetop time, minus one minute, at high pressure, with just enough liquid to cover. A 10-minute penne goes 4 minutes. Quick release immediately — pasta overcooks in seconds under residual pressure.
Soups and stews for a walk-in-the-door dinner
- Instant Pot spiced Mexican black bean soup — dried black beans, no soak, 35 minutes.
- Instant Pot curried cauliflower and apple soup — blends smooth right in the pot.
- Instant Pot spiced turkey and zucchini noodle soup — light, quick, and good for leftovers.
- Instant Pot Vietnamese pho-inspired beef soup — compresses a long broth into about 45 minutes.
- Instant Pot spiced Moroccan lamb stew — a weekend-tasting braise on a school night.
- Garlic and herb Instant Pot lentil soup — pantry-only, under 30 minutes.
Soups are where natural release matters most. A pot of hot liquid at pressure will spit through the valve on a quick release and make a genuine mess. Give it 15 minutes on its own.
Vegetarian dinners
- Instant Pot spiced Indian lentil dal — the canonical dal tadka; red lentils need only 8 minutes.
- Instant Pot Indian-spiced lentil dal — a slightly richer variation.
- Instant Pot Indian-spiced lentil and spinach curry — greens stirred in after pressure.
- Instant Pot vegetable curry with coconut milk — coconut milk after cooking, always.
- Instant Pot eggplant bhartha with chickpeas — smoky and substantial.
Dried legumes are the single best economic argument for the appliance. A pound of dried chickpeas costs about $1.80 and yields roughly the volume of four $1.00 cans, and pressure cooking takes them from dry to done in 35 minutes with no soak. They're also among the densest plant proteins in the pantry — USDA FoodData Central puts cooked chickpeas at roughly 9 grams of protein per 100 grams, and the Harvard Nutrition Source's protein guidance treats legumes as a direct substitute for a meat portion.
Troubleshooting: BURN, sputtering, and undercooked rice
BURN / OVERHEAT. The pot detected scorching on the base. Causes, in order of frequency: not enough thin liquid; tomato sauce or dairy stirred into the bottom instead of layered on top; browned fond left unscraped after sautéing; or too much starch (rice, pasta) settling on the base. Fix: release pressure, open, deglaze the bottom thoroughly with a wooden spoon and ½ cup water, layer thick ingredients on top, restart.
Steam escaping from the lid rim instead of the valve. The sealing ring is misaligned, dirty, or worn. Pull it out, wash it, seat it fully into its groove.
Rice comes out crunchy. Almost always a quick release cutting the steam phase short. Rice needs the natural release to finish absorbing; give it a full 10 minutes.
It takes forever to come to pressure. That's normal and it's not a fault — 10 to 15 minutes for a full pot of cold liquid. Recipe times never include it, so budget for it.
Building a week around the pot
The realistic pattern that makes the appliance pay for itself: one big protein cook on Sunday (shredded chicken, carnitas, or a chuck roast), then three weeknight dinners assembled from it in under 20 minutes. Add one dried-bean or lentil run and you've covered a meatless night too. Our Sunday meal prep guide covers the storage and portioning side of the same routine.
A 6-quart pot suits one to four people; the 8-quart makes sense for five or more, or for anyone who wants to pressure-can or cook whole chickens. Both take exactly the same recipes — only the liquid minimum changes. Look for the small accessories that actually get used: a steamer trivet, an extra sealing ring, and a stackable pot-in-pot insert, all of which live in small appliances and cookware.
Common pitfalls
1. Thick sauce on the bottom. Layer it on top, unstirred, or add it after cooking. This is the number one BURN cause.
2. Dairy under pressure. Cream, milk, and coconut milk curdle or scorch. Stir them in after.
3. Quick-releasing a full pot of soup. Hot broth out the valve, every time. Natural release.
4. Not counting pressurization time. A "15-minute" recipe is realistically 30 door-to-table.
5. Cooking lean cuts long. Chicken breast at 15 minutes is stringy. Use thighs, or run breasts at 8 minutes with a natural release.
Real-world timings: pressure vs. the usual method
The number that matters for a weeknight isn't wall-clock time, it's hands-on time. Every figure below includes pressurization and release, which recipe cards almost never do.
| Dish | Conventional method | Instant Pot, door-to-table | Hands-on |
|---|---|---|---|
| Chuck pot roast, 3 lb | 3 hr 15 min oven braise | 1 hr 10 min | 15 min |
| Pork shoulder carnitas, 4 lb | 4 hr oven | 1 hr 15 min | 20 min |
| Dried chickpeas, 1 lb | 8 hr soak + 90 min simmer | 45 min | 5 min |
| Red-lentil dal | 40 min simmer, stirred | 25 min | 8 min |
| Chicken stock from a carcass | 6 hr simmer | 2 hr 15 min | 10 min |
| White rice, 2 cups | 25 min stovetop | 24 min | 2 min |
Rice is the honest case: the pot saves you roughly one minute of clock. What it saves is attention — no watching for the boil, no timer, no lifting the lid to check. Across a week, that difference is why the appliance sticks and a second Dutch oven doesn't.
The braises are where the clock actually moves. A chuck roast drops from three hours to about seventy minutes because collagen converts to gelatin at 250°F in a fraction of the time it takes at a 200°F oven braise. Anything with connective tissue behaves the same way; anything without it, like a chicken breast or a pork tenderloin, gets no benefit at all and usually gets worse.
When the Instant Pot isn't the right call
Beginners get burned less by bad technique than by pointing the pot at the wrong dish. Five cases where you should reach for something else:
Anything that needs a crust. Seared steak, crisp-skinned chicken thighs, roasted vegetables with browned edges. The inside of a pressure cooker is a 100%-humidity environment — browning is chemically impossible there. Sauté first or broil after, but the pressure phase will never crisp anything.
Single portions. A 6-minute cook behind 12 minutes of pressurization and a 10-minute release is a 28-minute dinner for one. A skillet beats it outright.
Dishes you taste and steer. Risotto, reduction sauces, anything you correct as it goes. The lid locks; you get one shot at the seasoning and one shot at the liquid ratio. Season at the end in the residual heat instead.
Delicate proteins and green vegetables. Flaky fish, shrimp, broccoli, and green beans go from raw to disintegrated inside about ninety seconds of each other. Low pressure and a hard quick release make it survivable, not good.
One-pot meals with mismatched cook times. Chicken thighs at 10 minutes and zucchini at 1 minute cannot share a run. Either stage them across two cooks or use the pot-in-pot trivet, which is the reason that accessory exists.
Sources
- Pressure cooking — physics, history, and safety (Wikipedia)
- Instant Pot — design and multicooker functions (Wikipedia)
- USDA FoodData Central — nutrient data for the ingredients above
- Harvard Nutrition Source — protein and healthy eating guidance
Full ingredient lists, timings, and one-tap shopping for every recipe above are on AislePrompt. Last reviewed August 2026.
Frequently asked questions
Do I really need 1 cup of liquid in every Instant Pot recipe?
What does natural vs quick release mean, and when do I use each?
Why does my Instant Pot say BURN?
Can I open the pot mid-cook to check on things?
Is a beginner better off with a 6-quart or 8-quart model?
Sources
Got the Instant Pot. Now what goes in it?
Ask our AI for a week of pressure-cooker dinners — it builds the shopping list and sends the cart to Instacart.
Get Instant Pot dinners →