How to Cook Chicken Breast: 10 Methods That Never Dry Out + 15 Recipes
Pull at 155°F, brine before you cook, pound to even thickness — the three rules that turn dry weeknight chicken into the best protein on your plate, plus fifteen catalog recipes that prove it.
Chicken breast has a bad reputation it doesn't deserve. The reputation comes from cooking it to the temperature your grandmother used (and so does your meat thermometer's chicken preset), which is 165°F — the temperature at which chicken is dry, chalky, and the texture of a damp eraser. The fix is three rules: pull at 155°F, brine for 30 minutes, pound to even thickness. Everything else in this guide — how to buy chicken, the four core techniques, fifteen catalog recipes that show each technique in action, marinades that actually penetrate, how to slice against the grain, and the small kitchen upgrades that turn a 30-minute weeknight slog into a 15-minute win — fits around those three rules.
Get a free week of easy dinners
Seven weeknight dinners with the shopping list already totalled, sent Sunday. No account needed, unsubscribe in one click.
No spam, unsubscribe in one click. Recipes, shopping lists and Instacart carts all work without an account either way.
Why chicken breast has a bad reputation it doesn't deserve
Chicken breast is the most popular cut of meat in America (about 60% of the chicken sold, per USDA data on poultry consumption). It's also the cut most people cook badly. The reasons stack: factory chicken has gotten enormous (a "standard" breast in 2026 is 10-12 ounces, vs. 4-6 oz a generation ago), thermometers default to 165°F (the FDA instant-kill temperature, not the eating-quality target), and most home cooks were taught to cook chicken to "no pink" — which lands at 170-180°F internal, well into chalk territory.
The good news: chicken breast is also the easiest weeknight protein to nail once you internalize the rules. It's $4-$6 per pound (vs. $12 for salmon, $18 for ribeye), reheats well, takes any flavor profile, and pairs with literally any side. A 6-oz portion is ~165 calories, 31 grams of complete protein, and 0g of carbs — the macro shape that most weeknight dinners are built around. The three rules at the top of this guide eliminate the dry-chicken problem permanently. The fifteen catalog recipes below prove it across pan-sear, bake, grill, sheet-pan, and skillet techniques.
This guide is written for the home cook who's tired of dry weeknight chicken and ready to fix it tonight. There's no "you'll need a sous vide and 47 minutes" nonsense, no marketing fluff, and no recipes that require a trip to a specialty grocery store. Everything links to a tested recipe in our catalog with verified ingredients and a real photo. Twenty minutes from now you can have dinner on the plate.
How to buy: air-chilled vs water-chilled, organic vs conventional, size matters
The first decision is where to shop and what to look for. Three things matter; the rest is marketing.
Air-chilled vs water-chilled. Most US chicken is water-chilled — dunked in a chlorinated water bath after slaughter to drop the temperature fast. The birds absorb 4-8% water weight, which you pay for at the register and steam out in the pan (which is why your "fresh" chicken sits in a puddle by the time you flip it). Air-chilled chicken is cooled by cold air instead, which costs more per pound but doesn't add water. Look for "air-chilled" on the package; brands like Mary's, Bell & Evans, and Smart Chicken are widely available. The texture difference is real — air-chilled chicken sears crisper and doesn't release water into the pan.
Organic vs conventional. This one matters less than air-chilled vs water-chilled. Organic chicken is fed organic grain, raised without antibiotics, and given outdoor access; conventional is fed conventional grain, may be given antibiotics, and is raised indoors. The flavor difference at the table is small; the cost difference is large (~50% premium). If you're optimizing budget, buy conventional air-chilled before organic water-chilled. If you're buying organic for ethical reasons, that's a separate decision and a fine one.
Size matters more than people realize. A "standard" supermarket chicken breast in 2026 is 10-12 oz. Your recipes were written for 6-oz breasts. The cooking times in every recipe you've ever followed are wrong for what's in your package today. The fix is either to pound the breast to even thickness (about ¾ inch, so it cooks evenly and faster) or to butterfly it (slice horizontally almost through, open like a book). Both turn an unwieldy 12-oz breast into something that cooks in 8 minutes instead of 16, with no dry edges.
What to look for at the counter
| Cue | Good | Bad |
|---|---|---|
| Color | Pale pink, even | Yellow, grey, or with bruising |
| Smell | Neutral, faintly meaty | Sour, sulfurous, ammonia-like |
| Texture | Firm, springs back when pressed | Slimy, sticky, finger leaves dent |
| Package liquid | Minimal (1-2 tsp) | Pooled or pink-tinged |
| Sell-by date | 2+ days out | Today or yesterday |
| Label | "Air-chilled", "no antibiotics ever" | "All natural" (means nothing) |
A trick for size: buy "thin-sliced" or "chicken cutlets" if you have the option — those are pre-pounded breast halves, ready for the pan. They cost ~$1/lb more and save you 5 minutes per dinner. For long-term meal prep, buy whole breasts on sale and pound them yourself; for tonight's dinner, cutlets are the time-saver.
The single rule that fixes 90% of dry chicken (165°F is too high)
Pull chicken breast from the heat at 155°F internal temperature, rest it for 3 minutes, eat it. Carryover cooking will bring the center to 162°F during the rest — past the FDA's pathogen-inactivation threshold, well short of the dry-eraser line at 170°F. That's it. That's the rule.
The FDA's 165°F target is an instant-kill temperature: hold chicken there for one second and salmonella is dead. But 150°F held for 3 minutes is equivalent. (The USDA publishes the time-temperature tables; Serious Eats' chicken-doneness guide walks through the math.) Pull at 155°F, rest 3 minutes, and you spend those 3 minutes well past the safety threshold while the moisture stays in the meat where you want it.
A cheap instant-read thermometer is the single best $15 you'll spend on cooking chicken. Insert it horizontally through the side of the thickest part of the breast, aimed at the center. Read after 2-3 seconds. ThermoPro and Lavatools both make models around $15-$20; the Thermapen at $89 is the chef's standard but unnecessary for home cooking. What's NOT acceptable is cooking chicken by sight or by the "press with your finger" trick — your fingers are not calibrated and chicken is not steak.
Doneness map by temperature
| Internal temp (pull from heat) | Final after rest | Doneness | Texture |
|---|---|---|---|
| 145°F | 152°F | Pink-tinged, very juicy | Use only for sous-vide-pasteurized |
| 155°F | 162°F | Perfect | Juicy, tender, opaque |
| 160°F | 167°F | Slightly past peak | Fine, edges dry |
| 165°F | 172°F | Past peak, drying | The "default" — too far |
| 175°F+ | 180°F+ | Chalk | Avoid |
The single most important fact: pull temp and serving temp are different numbers. Most cooks pull at "done" and end up at "overdone" after a 5-minute rest. Pull at 155°F. Rest 3 minutes. Cut. Eat. The first time you do this, you'll wonder how you ever cooked chicken any other way.
The 4 core techniques: brine + sear, sous vide, reverse sear, poach
Almost every chicken breast dinner you'll cook is a variation on one of four techniques. Learn each once and you're done.
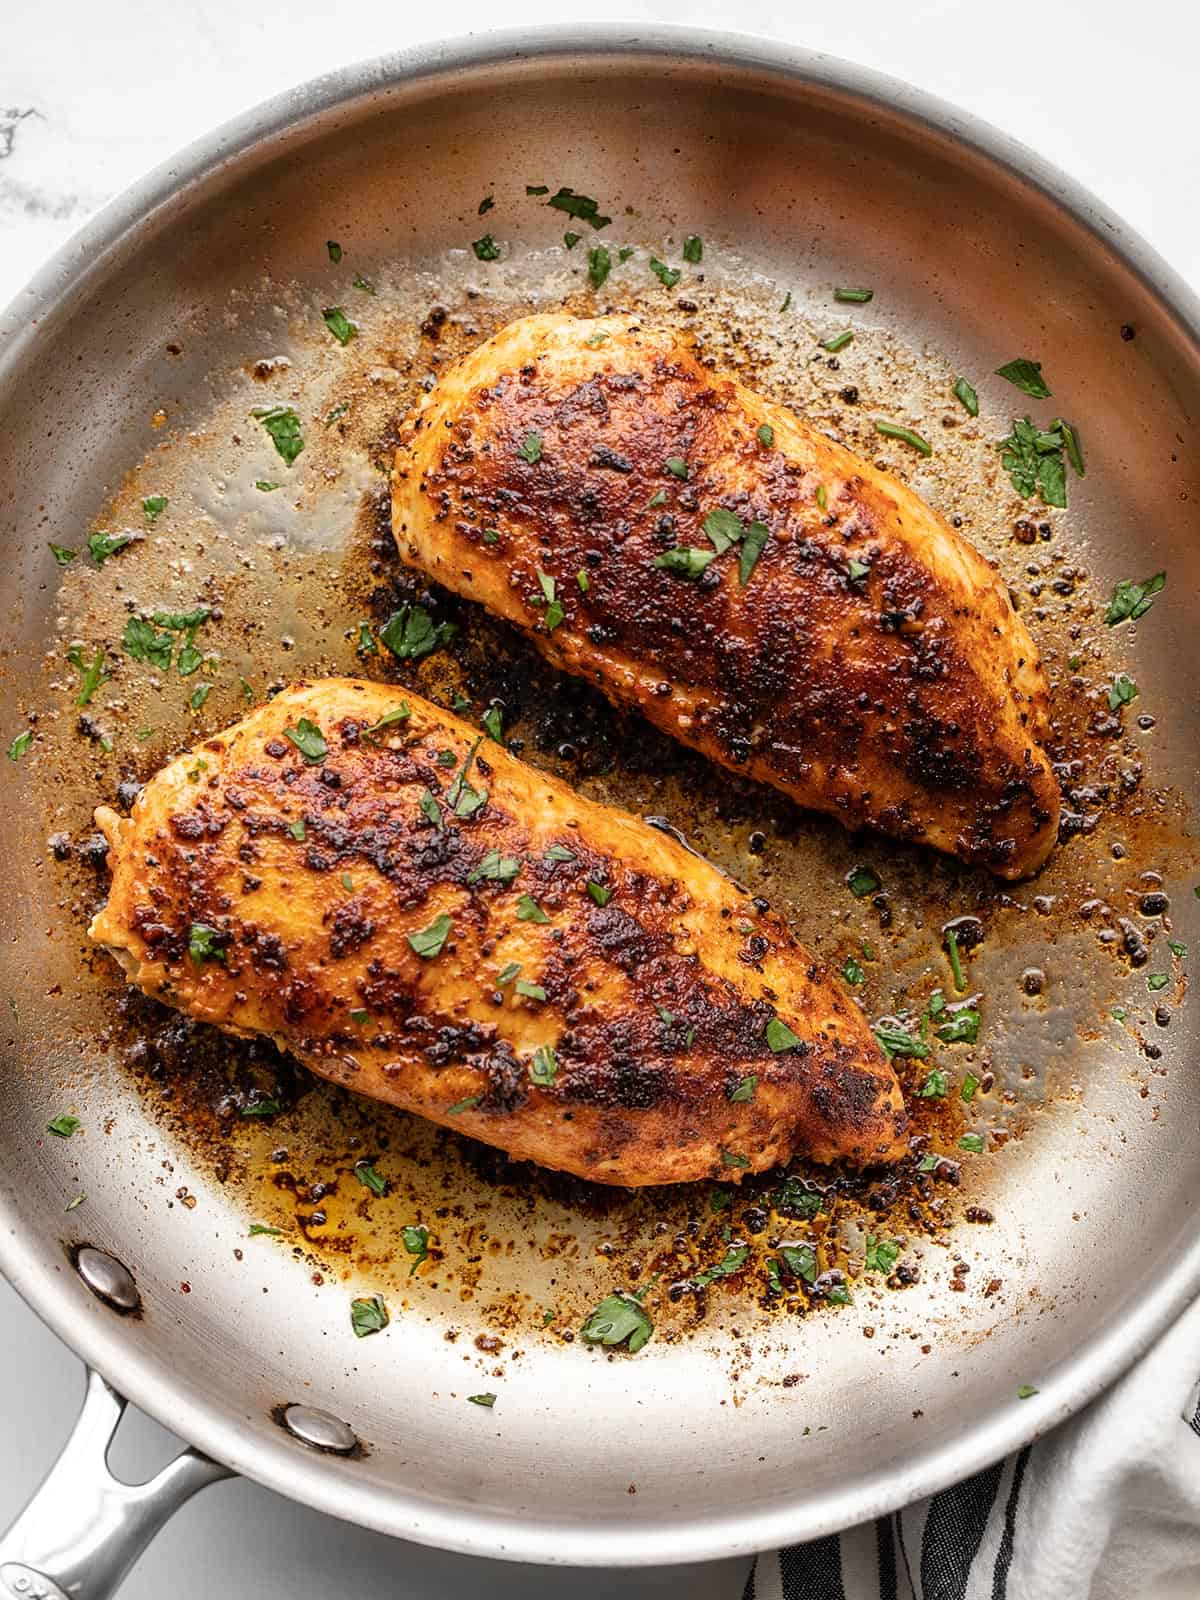
1. Brine + pan-sear (15 minutes, the king technique). Brine the breast in a 30-minute wet brine (¼ cup kosher salt per quart of warm water, dissolved, then cooled) or a 4-24 hour dry brine (1 teaspoon kosher salt per pound, rubbed on, rested uncovered in the fridge). Pat the breast dry with paper towels — this is the most important step — and pound or butterfly to even ¾-inch thickness. Heat a heavy stainless or cast-iron skillet over medium-high until a drop of water skitters and evaporates. Add 1 tablespoon of neutral oil; let it shimmer. Lay the breast in, smooth-side-down. Do not move it for 4 minutes. Flip, cook 3-5 more minutes (depending on thickness) or until 155°F internal. Pull, rest 3 minutes. This is the technique behind Pan-Seared Chicken with Herb Pan Sauce and Roasted Vegetables, Pan-Seared Chicken with Ozark Honey Mustard Glaze, and most weeknight chicken you'll cook for the rest of your life.
2. Sous vide (90 minutes, hands-off, foolproof). Vacuum-seal the breast (or use a zip-top bag with the water-displacement method) with salt, pepper, a sprig of thyme, and a knob of butter. Drop into a 145°F water bath for 90 minutes. Pull out, pat dry, sear in a screaming-hot skillet for 60 seconds per side just for color and crust. The breast is pasteurized at 145°F (longer time, lower temperature equals 165°F instant-kill), comes out impossibly juicy, and can't be overcooked. The disadvantage: requires an immersion circulator (~$80) and 90 minutes of clock time. Worth it for batch cooks where you're making 6+ portions for the week.
3. Reverse-sear (35 minutes, the bake-then-sear technique). Place the seasoned breast on a wire rack over a sheet pan; bake at 275°F until it reads 140°F internal (about 25 minutes for a 6-oz breast, 35 minutes for a 10-oz). Pull, immediately sear in a screaming-hot skillet for 60-90 seconds per side until 155°F and well-browned. Pull, rest 3 minutes. The slow oven phase gives you edge-to-edge evenly-cooked meat (no overdone outer band); the fast sear gives you the crust. Best technique for thick, irregularly-shaped breasts.
4. Poach (12 minutes, the lean meal-prep technique). Bring 4 cups of water to a bare simmer in a wide skillet. Add a bay leaf, 5 peppercorns, a smashed garlic clove, and a teaspoon of salt. Slide in the breast(s). Turn the heat to LOW so the water doesn't bubble — it should be at a gentle steaming temperature, around 165-170°F surface. Cover, cook 12-15 minutes (depending on thickness) until 155°F internal. Pull, pat dry. Slice or shred for salads, sandwiches, soups, casseroles. Perfectly juicy, completely flavor-neutral, the gold standard for meal-prep chicken.
A fifth technique deserves its own line: grill. Brine first (same 30-minute wet brine), oil the breast, grill over medium-high direct heat for 4-5 minutes per side until 155°F. Use the sear-side-down trick: don't move it for the first 4 minutes; the breast releases from clean grates when the crust forms. Hawaiian Teriyaki Grilled Chicken and Grilled Mediterranean Lemon-Herb Chicken with Alkaline Marinade are the canonical versions. The catch: grilled chicken without a brine and a thermometer dries in 60 seconds. Both are non-negotiable for grilled chicken breast.
15 chicken breast recipes from the catalog
These are the highest-quality chicken breast recipes in our catalog (or the closest chicken-breast-friendly recipe by technique), grouped by technique. Each link is canonical, tested, and ready to cook tonight. Pick by mood — fast weeknight pan-sear, sheet-pan dinner with vegetables roasted alongside, grill night, or skillet one-pan.
Pan-sear (the everyday technique)
1. Pan-Seared Chicken with Herb Pan Sauce and Roasted Vegetables — the flagship brine-and-pan-sear, with a quick herb butter pan sauce. The recipe to learn first.
2. Pan-Seared Chicken with Ozark Honey Mustard Glaze — same pan-sear technique, finished with a sweet-tangy honey-mustard glaze. Brush the glaze on in the last 90 seconds so the sugar caramelizes but doesn't burn.
3. Pan-Seared Chicken Parmesan with Garlic Tomato Sauce — pan-seared cutlet, breaded, finished with garlic tomato sauce and broiler-melted mozzarella. Dinner-party-looking on a Tuesday.
4. One-Skillet Chicken Piccata with Lemon-Caper Sauce — classic brine-and-skillet piccata with lemon, capers, white wine. The "I want a brighter chicken dinner" pick.
5. Pan-Seared Chicken with Mushroom Marsala Sauce — pan-seared cutlet, finished with a creamy mushroom marsala. The cold-weather dinner that pulls double duty for date night.
Bake / reverse-sear (the hands-off technique)
6. Italian Oven-Baked Chicken Parmesan with Fresh Basil — the slow-bake chicken parmesan, no frying required. Sheet-pan format, scales to 4-6 portions without effort.
7. Herb-Crusted Baked Chicken with Lemon and Thyme — herb-crusted bake at 400°F with lemon and thyme. The dinner you make Sunday for Monday's lunch.
8. Maple-Glazed Chicken Breast with Roasted Root Vegetables — explicitly chicken breast, maple-glazed, with roasted root vegetables roasted on the same sheet pan. Fall + winter weeknight default.
Sheet pan + skillet (one-pan weeknights)
9. Sheet Pan Garlic and Lemon Chicken with Asparagus — sheet pan with chicken breast and asparagus tossed in garlic-lemon oil. Single pan, single shelf, 25 minutes from start to plate.
10. Sheet Pan Lemon-Garlic Chicken with Jazzed-Up Roasted Vegetables — sheet pan with chicken breast and a full rainbow of roasted vegetables (carrots, peppers, fennel, red onion). Restaurant-grade weeknight payoff.
11. One-Pot Lemon Chicken with Asparagus and Cherry Tomatoes — one-pot chicken with asparagus and cherry tomatoes; the breast simmers in the lemon-butter sauce so it stays moist even past 155°F.
12. One-Pan Chicken Fajita Skillet with Bell Peppers — skillet chicken fajita with bell peppers, smoky cumin-paprika rub. From "what's for dinner?" to plate in 20 minutes flat.
Grill (the summer / weekend technique)
13. Citrus-Marinated Grilled Chicken Fajitas with Peppers and Onions — citrus-marinated grilled chicken fajitas. Marinate 2 hours, grill 8 minutes, slice, serve in warm tortillas. Cookout-friendly, scales to 8 people without effort.
14. Hawaiian Teriyaki Grilled Chicken — Hawaiian teriyaki-marinated grill. Sweet, savory, lacquered, perfect for the wood-fire or gas grill. The flavor profile most kids will eat without complaining.
15. Grilled Mediterranean Lemon-Herb Chicken with Alkaline Marinade — Mediterranean lemon-herb marinade, oregano and garlic, served over rice or wrapped in pita. The summer-cookout default that doubles as next-day grain-bowl meat.
A working rotation: two pan-sear weeknights, one sheet-pan weeknight, one skillet one-pan, one grill on the weekend. Five dinners, four techniques, the whole week's chicken handled. Mix in the salmon guide on the off-night for omega-3 balance.
Marinades and brines that actually penetrate the meat
Brines and marinades do two different things, and people conflate them constantly. Brines (salt + water + sometimes sugar) season the meat and increase moisture retention; marinades (acid + oil + aromatics) flavor the surface and tenderize the outer ¼ inch. Both have a place; neither replaces the other.
Wet brine (30 minutes, the moisture booster). Dissolve ¼ cup of kosher salt in 1 quart of warm water. Let cool to room temperature. Submerge the chicken breasts; refrigerate 30 minutes to 4 hours. Rinse, pat dry. The brine penetrates 1/8-1/4 inch into the meat — the depth you taste — and the salt restructures muscle proteins so they hold water through cooking. 10% better moisture retention, dramatic flavor improvement. The single biggest improvement to home-cooked chicken, period; Cook's Illustrated has the science worked out.
Dry brine (4-24 hours, the texture booster). Rub 1 teaspoon kosher salt per pound of chicken on all surfaces. Rest uncovered in the fridge 4-24 hours. The salt draws moisture out, dissolves into a concentrated brine on the surface, and then pulls back into the meat. Same moisture-retention benefit as a wet brine, plus dramatically crispier skin (because the surface dries during the rest). Easier than a wet brine and arguably better for skin-on cuts.
Classic marinade (2-12 hours, the flavor injector). Three parts oil, one part acid (lemon juice, vinegar, buttermilk, yogurt), aromatics (garlic, herbs, ginger, chili). Submerge or massage into the chicken in a zip-top bag. Marinate 2-12 hours; less than 2 doesn't penetrate, more than 24 starts breaking down the surface texture (especially with acidic marinades). The Mediterranean marinade in Grilled Mediterranean Lemon-Herb Chicken with Alkaline Marinade and the citrus marinade in Citrus-Marinated Grilled Chicken Fajitas with Peppers and Onions are catalog-tested examples.
Buttermilk brine (4-12 hours, the steakhouse trick). Two cups of buttermilk + 1 tablespoon kosher salt + crushed garlic + black pepper. Submerge the chicken. The buttermilk's calcium and lactic acid tenderize without turning the meat to mush; the salt brines. Pat dry before cooking. Wildly underrated for grilled, fried, or pan-seared chicken; this is the secret to the fried-chicken-shop chicken that doesn't dry out.
Common pitfall — too much acid for too long. Acidic marinades (more than 25% acid by volume, or any acid for more than 4 hours) start "cooking" the surface of the chicken through denaturation, leaving you with an opaque, mushy outer layer before you ever turn on the heat. If you're using a high-acid marinade (citrus juice, vinegar, wine), keep it to 2 hours max. For longer marinades, dial the acid back to 10-15% of total volume.
How to slice chicken breast (against the grain, every time)
Slicing properly turns a tough breast into a tender one. The grain in a chicken breast runs lengthwise (head-to-tail when the bird was alive). Slicing with the grain leaves you with long muscle fibers that the diner has to chew through. Slicing against the grain cuts those fibers short, so they fall apart in your mouth.
Look at the cooked breast: you'll see lines running lengthwise along its length. Position your knife perpendicular to those lines (across the breast, not along it). Slice at a 45-degree angle for a slightly larger surface area per piece, which presents better on the plate and adds even more tenderness.
A sharp chef's knife makes this trivial; a dull knife crushes the meat and squeezes out the juices you worked to preserve. Sharpen every 3-6 months (Wüsthof, MAC, and Mac all charge ~$10/edge to sharpen, or buy a $30 pull-through sharpener and DIY). The difference between a sharp knife and a dull one is bigger than the difference between a $30 knife and a $300 knife.
Slice thickness depends on use:
- Sandwiches / wraps: ¼ inch, slightly diagonal
- Salads / bowls: ½ inch, on a strong diagonal
- Stir-fries: ¼ inch strips, with the grain (intentionally — the strips brown faster and don't fall apart in the wok)
- Soups / casseroles: Shred with two forks while warm
Slice immediately before serving, not before reheating. Whole pieces hold moisture better than sliced ones in storage; once sliced, the cut surfaces dry fast even in airtight containers.
What to buy: instant-read thermometer, cast iron, sharp knife
A working chicken-breast setup is five items. None are expensive; all pay back the first month.
An instant-read thermometer. $15-$89. The single tool that ends the dry-chicken problem. ThermoPro TP19H is $20 and reads in 3 seconds; the Thermapen ONE is $89 and the chef's standard but unnecessary for home cooking. Get one from the utensils picks; don't try to cook chicken without one.
A heavy stainless or cast-iron skillet. Pan-searing requires heat retention. A 10-12 inch stainless or cast-iron pan ($30-$200) holds the heat that a thin nonstick pan can't, which is what produces the crust. Cast iron is cheaper and lasts a generation; stainless is easier to deglaze for a pan sauce. Get one or the other from the cookware picks — both work; pick by which you'd use more often.
A meat pounder (or a heavy skillet). $15-$30. Or use the flat side of a heavy skillet wrapped in plastic. Pound thick breasts to ¾-inch uniform thickness; this single step shaves 5-7 minutes off the cook and eliminates the dry-edges-undercooked-center problem.
A wire rack + half-sheet pan. $25-$35 together. For bake and reverse-sear, the rack lifts the chicken off the pan so the bottom doesn't braise in released juices. Heavy-gauge half-sheet pans don't warp and outlast the rest of your kitchen. The small-appliances picks include the sous vide option for technique #2; the bakeware is in cookware too.
A sharp 6-8 inch chef's knife. $50-$150 for a good knife (Wüsthof Classic, MAC Pro, Misen) plus $5-$10 twice a year to sharpen. Slicing against the grain is impossible with a dull knife; the meat tears instead of slicing cleanly. See knives picks for the curated list.
Five tools, total bill $130-$400. Cook chicken breast twice a week for a year and you've made hundreds of dinners on this setup; the per-dinner cost rounds to zero.
Real-world numbers: cost, time, nutrition
What does chicken breast actually deliver versus other weeknight proteins? US 2026 grocery prices:
| Protein | Price/lb (avg) | Cooked yield/lb | Cost per 6-oz portion | Active cook time | Protein (g/serving) |
|---|---|---|---|---|---|
| Chicken breast (boneless, conventional) | $5 | 0.80 lb | $1.20 | 12 min | 31 |
| Chicken breast (air-chilled, organic) | $9 | 0.85 lb | $2.00 | 12 min | 31 |
| Chicken thighs (boneless) | $4 | 0.85 lb | $0.90 | 14 min | 27 |
| Ground beef (85/15) | $7 | 0.75 lb | $1.75 | 8 min | 22 |
| Pork tenderloin | $6 | 0.80 lb | $1.40 | 14 min | 25 |
| Farmed Atlantic salmon | $12 | 0.75 lb | $3.00 | 10 min | 22 |
The numbers that matter: chicken breast delivers 31g of protein per portion at ~$1.20 — the highest protein-per-dollar of any common weeknight meat. It's also the leanest (1.5g of fat per 6-oz portion, vs. 13g for thighs and 18g for 85/15 beef). For households trying to hit a protein target without blowing the grocery budget, this is the single best lever.
The trade-off: chicken breast is unforgiving. Beef forgives a 20°F overcook; salmon forgives a 10°F overcook; chicken breast turns to chalk at 170°F regardless. The thermometer-and-pull-at-155°F rule is what unlocks the cost-per-protein math. Without it, you're paying $1.20 a portion to make food no one wants seconds of.
Common pitfalls and how to avoid them
Six mistakes show up over and over with weeknight chicken. Each has a one-paragraph fix.
1. Cooking to "no pink" by eye. Chicken at 155°F internal still looks faintly pink at the bone (and near the bone of bone-in cuts). That's not undercooked — it's perfectly cooked. Use the thermometer. Always. Pink at 165°F is myoglobin, not blood, and it's safe.
2. Cooking 12-oz breasts as if they were 6-oz. A modern supermarket breast is roughly double the size your grandmother cooked. Without pounding or butterflying, you get a charred crust and a raw center, or worse, an evenly overcooked piece in the time it takes the middle to come up. Pound or butterfly. Every time.
3. Wet chicken, cold pan. Pat the chicken dry. Get the pan ripping hot before the meat hits it. Both together, or you steam-cook the bottom and lose the crust. The water-droplet test: a drop should skitter and evaporate in under a second.
4. Trying to move it too early. A properly-heated stainless or cast-iron pan releases the chicken when the crust forms — usually 3-4 minutes on the first side. If it sticks when you nudge it, give it another 30 seconds. Don't force it with a spatula; the crust hasn't released yet.
5. Skipping the rest. A 3-minute rest after pulling lets carryover finish the cook (to 162°F from 155°F) and lets the muscle fibers reabsorb the juices that migrated to the surface during cooking. Cut into a chicken breast immediately and 60% of the juice runs onto the cutting board; rest 3 minutes and 90% stays in the meat.
6. Storing sliced. Slice on demand. Whole cooked breasts in an airtight container with a tablespoon of broth keep moist for 3-4 days; pre-sliced ones dry out by day 2 even in the same container. Reheat at low temperature (300°F oven, covered) — the microwave at full power destroys chicken in 60 seconds.
When NOT to use chicken breast (it's not always the right cut)
Chicken breast isn't a universal weeknight default. Three cases where another cut wins:
Slow-cooker or braise. Chicken breast turns stringy and dry in a slow cooker or braise — even at sub-160°F internal temperatures, the lack of fat means it shreds into floss. Use chicken thighs (or whole legs) for any low-and-slow application. Curries, stews, pulled chicken, braised dishes — all of it wants thighs.
Stir-fry where you want maximum flavor. Boneless skinless thighs sliced into strips have more fat, more flavor, and stay tender at higher wok temperatures than breast. If you're stir-frying for flavor (not for the lean macros), use thighs. Save the breast for nights when the macros matter more.
Soup base. A whole chicken (bone-in, skin-on) makes infinitely better stock than chicken breast trimmings. If you're making a chicken soup with a homemade stock, buy a whole bird, simmer the carcass for the broth, and shred the meat into the finished soup. Breast-only soup with store-bought broth is fine for weeknight purposes but not the best version of the dish.
For every other weeknight scenario — fast pan dinner, grill night, sheet-pan, salad protein, sandwich filling, taco filling, meal-prep base — chicken breast is the answer if you cook it to 155°F and pull. The math is mostly that good.
FAQ
Why does my chicken breast always come out dry? You're cooking it to 165°F internal temperature in the pan or oven, then it climbs to 170-175°F during rest, which is well past dry. Pull it at 155°F; carryover brings it to 162°F, which is safe (the FDA's 165°F is an instant-kill temperature, but 150°F held for 3 minutes is equivalent). The other half of the problem is buying 12-oz breasts and cooking them as if they were 6-oz — pound them flat or butterfly first.
Does brining actually make a difference? Yes, dramatically. A 30-minute wet brine (¼ cup salt per quart of water) increases moisture retention by about 10% and seasons the meat throughout. A dry brine (salt rubbed on the surface, rested uncovered in the fridge 4-24 hours) does the same thing with crispier skin. The difference between brined and unbrined chicken breast is the single biggest jump in home-cooked chicken quality — bigger than buying organic, bigger than expensive cookware.
Should I cook chicken with skin on or off? Skin-on, bone-in if you have time — the skin renders and crisps, the bone insulates the meat and adds flavor. Skinless boneless is for fast weeknight cooking where you'll sear and slice into a bowl or stir-fry. If you remove skin to save calories, save it for stock — never throw away chicken skin. The flavor cost of skinless cooking is real but acceptable for the 25-minute weeknight win.
How do I store and reheat cooked chicken without drying it out? Store sliced or whole in an airtight container with 1-2 tablespoons of the cooking juices or broth poured over it; this rehydrates the surface during storage. Reheat covered at low heat (300°F oven for 8 minutes, or a covered skillet over low) — the microwave at full power destroys cooked chicken in 60 seconds. If you reheat regularly, slightly undercook the chicken on day 1 so day-3 reheat lands at perfect doneness.
Can I cook chicken breast from frozen? Yes — bake at 350°F for about 50% longer than thawed (40-45 minutes for a 6-oz breast) and don't skip a thermometer check. Skip the pan-sear technique from frozen; the outside burns before the inside thaws. Even better, transfer chicken from freezer to fridge the morning of cooking; 8 hours covers most thicknesses. Never thaw chicken on the counter at room temperature.
Sources
- Serious Eats — The Best Way to Cook Chicken Breast — the technique deep-dive that covers time-temperature equivalence and pasteurization math.
- USDA FSIS — Chicken from Farm to Table — official US food-safety guidance, storage temperatures, and labeling definitions.
- Cook's Illustrated — The Science of Brining — the chemistry of how salt restructures muscle proteins and why brined chicken stays moist.
Frequently asked questions
Why does my chicken breast always come out dry?
Does brining actually make a difference?
Should I cook chicken with skin on or off?
How do I store and reheat cooked chicken without drying it out?
Can I cook chicken breast from frozen?
Sources
Plan a week of meals in two minutes.
Tell our AI what you have and what you like — it builds your plan, shopping list, and Instacart cart. No account needed.
Try free →