How to Cook Chicken: 25 Recipes + Complete Guide
Buying, storage, the 5 core techniques, doneness, 25 catalog recipes, and the mistakes that wreck chicken even when you do everything else right.
Cooking chicken well comes down to four things: pick the right cut, season it harder than feels comfortable, control the heat in stages, and pull it at 160°F so carryover finishes the job at the food-safe 165°F. Get those right and chicken stops being the bland weeknight default and starts being the most flexible protein in your kitchen. This guide covers buying, storing, the five core techniques every home cook should master, doneness, 25 catalog recipes, and the mistakes that wreck chicken even when you do everything else right.
Get a free week of easy dinners
Seven weeknight dinners with the shopping list already totalled, sent Sunday. No account needed, unsubscribe in one click.
No spam, unsubscribe in one click. Recipes, shopping lists and Instacart carts all work without an account either way.
Why chicken is the most-cooked protein in America (and most-overcooked)
Americans eat roughly 100 pounds of chicken per person per year — more than beef and pork combined (USDA — Chicken from Farm to Table). It's cheaper than beef, leaner than pork, and forgiving enough that beginners can get edible results without much technique. That ubiquity is also why it's the most overcooked protein in the country: when a 5 oz breast hits 175°F, the muscle fibers contract hard and squeeze out the moisture, and you end up chewing on something that tastes like a wet eraser.
The fix is mechanical, not artistic. Chicken behaves the same way every time: protein denatures around 140°F, collagen breaks down between 160-170°F (key for dark meat), and the USDA-recommended safe temperature is 165°F at the thickest part. Anyone with a $15 instant-read thermometer and 10 minutes of attention can nail it on the first try. The rest of this guide is about removing every other variable so the thermometer is the only thing you need to think about.
How to buy chicken: breasts vs thighs vs wings, bone-in vs boneless, organic vs conventional
The cut you buy matters more than the brand. Here's the practical breakdown:
| Cut | Best for | Cook time (per side / oven) | Forgiveness |
|---|---|---|---|
| Boneless skinless breast | Salads, sandwiches, grilling, quick weeknights | 4-5 min/side at medium-high | Low — narrow doneness window |
| Boneless skinless thigh | Curries, braises, sheet pans, stir-fry | 5-7 min/side at medium-high | High — fat keeps it juicy |
| Bone-in skin-on thigh | Roasting, braising, the best-ever crispy skin | 35-40 min at 425°F | Very high |
| Bone-in skin-on breast | Roasting, smoking | 45-55 min at 375°F | Medium |
| Wings | Frying, baking, grilling, party food | 30-40 min at 425°F | High |
| Whole chicken (3-4 lb) | Sunday roast, meal-prep base | 60-75 min at 425°F | Medium |
Boneless skinless thighs are the smart-money cut. They cost roughly 30% less per pound than boneless breasts, they hold up to reheating, they don't dry out if you walk away from the stove for 60 seconds, and they have more flavor. Use breasts only when you specifically need sliced cooked chicken (chicken caesar, sandwich filling, meal-prep) or when a recipe demands the lower fat content.
Bone-in skin-on costs less and tastes better than its boneless counterpart for any cooking method that involves the oven. The bone insulates the meat, the skin renders into flavor, and you can crisp the skin into the best part of the meal. Boneless cuts are about saving prep time, not eating better.
Organic vs conventional: organic chicken costs 50-100% more and the nutritional difference is marginal. The upgrades that actually change how the chicken tastes are: air-chilled (drier skin that crisps in the oven), free-range or pasture-raised (better flavor, more humane), and brands with real sourcing reputations like Mary's, Bell & Evans, or Pat LaFrieda. If budget is tight, conventional chicken is safe and nutritious; spend the upgrade dollars on better cuts (thighs over breasts) or fresh produce.
A whole bird is the budget play if you have a sharp Chef's Knife and 10 minutes — break it down into two breasts, two thigh/leg quarters, two wings, and a back for stock, and you pay $1.50-2.50/lb instead of $5-8/lb for parts. It's the single best return on knife skills you can get.
How to store chicken safely
The 4 hours / 40°F rule is the only food-safety rule you have to memorize. Raw chicken stays safe at 40°F or below for 1-2 days from the sell-by date. Cooked chicken keeps 3-4 days refrigerated, 3 months frozen. Anything that spends more than 2 hours total at room temperature (1 hour if your kitchen is above 90°F) belongs in the trash, not the fridge (USDA Food Safety).
Practical rules that keep you out of trouble:
- Thaw in the fridge, never on the counter. A 5-lb whole chicken takes 24 hours; a 1-lb pack of breasts takes about 12. If you need it faster, submerge the sealed pack in cold water and change the water every 30 minutes — never warm water.
- Brine before you forget. A dry brine (1 tsp Diamond Crystal kosher salt per pound, rubbed on the surface, uncovered in the fridge for 4-24 hours) does more for chicken than any other prep step. The salt penetrates, breaks down muscle proteins, and seasons all the way through. Air-drying uncovered also crisps the skin.
- Separate raw and cooked surfaces. Use one cutting board for raw chicken, another for everything else. A good Cutting Board with a juice groove is $25 well spent.
- Wash your hands, not the chicken. Rinsing raw chicken aerosolizes Salmonella across a 3-foot radius of your sink (Eat Right — Cooking Poultry Tips). Pat it dry with paper towels instead.
The 5 core techniques: pan-sear, roast, grill, braise, poach
Master these and 95% of chicken recipes become trivial.
1) Pan-sear (boneless cuts, 8-12 minutes total)
The technique that turns a $4 piece of chicken into dinner in 10 minutes. Pat dry, salt aggressively, get a heavy skillet (cast iron or stainless) screaming hot with a thin film of neutral oil, lay the chicken away from you, then don't touch it for 4-5 minutes. When the protein releases cleanly from the pan, flip once, drop heat to medium, finish to 160°F internal, rest 5 minutes.
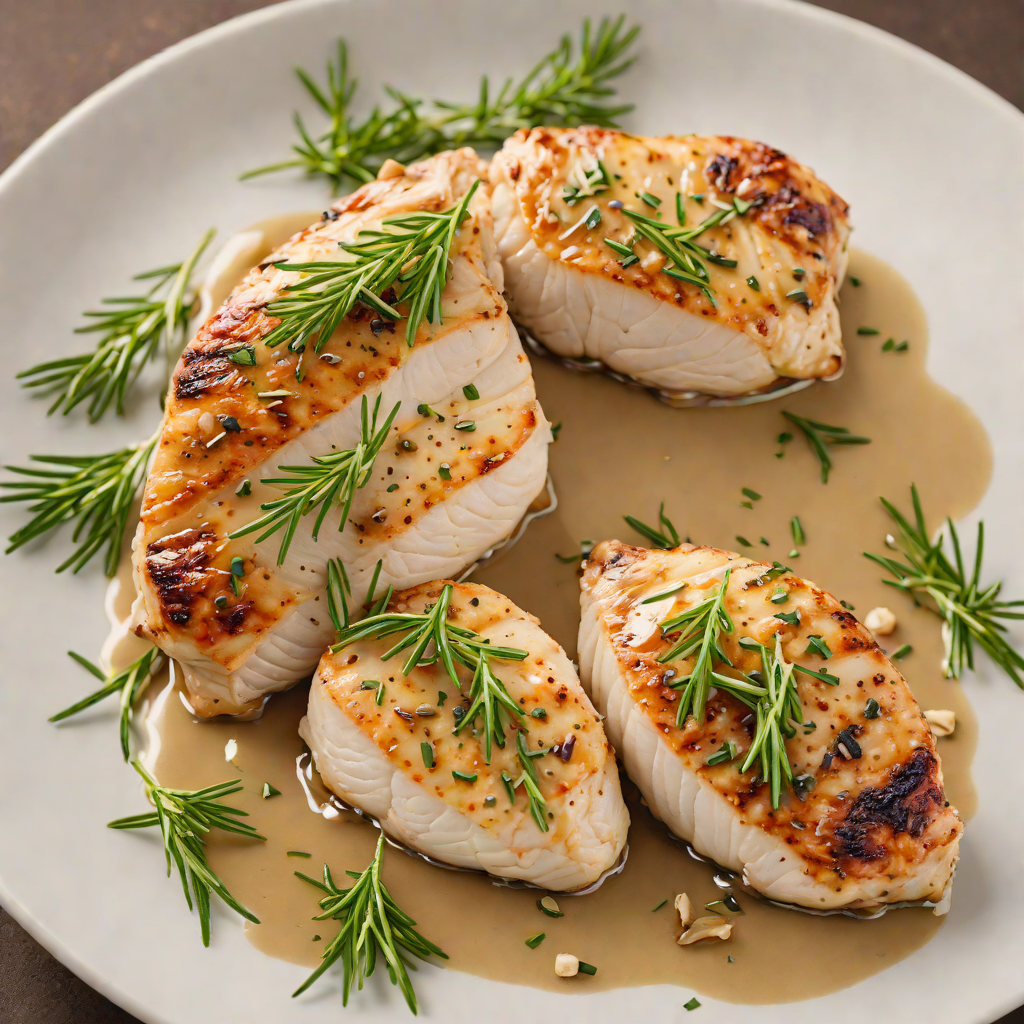
The two non-negotiables: dry surface and hot pan. Wet chicken steams instead of browning. A pan that isn't smoking-hot won't develop the Maillard crust that carries 80% of the flavor. The reference recipe is Pan-Seared Chicken Breast with Garlic and Rosemary Pan Sauce — pan sauce is the bonus trick: deglaze with white wine or stock after the chicken comes out, mount with cold butter, and you have restaurant-grade plating with five extra minutes.
For thigh-based variations on the same technique, Pan-Seared Chicken with Creamy Mushroom Marsala Sauce shows what happens when you build a wine-based sauce on top of the fond, and Sautéed Lemon Pepper Chicken with Garlic Herb Sauce gives you the bright, citrusy version that pairs with rice or roasted vegetables.
2) Roast (bone-in cuts or whole bird, 35-75 minutes)
Roasting is for when you want the skin to be the star. Pat the bird dry, salt heavily inside and out (ideally 24 hours ahead, uncovered, in the fridge), bring to room temperature for 30 minutes, then roast at 425°F. Don't open the oven for the first 30 minutes — every time you do, the temp drops 50°F and the skin stops crisping.
For pieces: Best-Ever Crispy Roasted Chicken Thighs is the no-fail entry point — 425°F for 35-40 minutes, skin-side up, on a wire rack over a sheet pan so air circulates underneath. For something more aromatic, One-Pan Greek Lemon Chicken with Olives and Tomatoes builds an entire meal on the same sheet.
The whole-bird upgrade is spatchcocking: cut out the backbone with kitchen shears, flatten the bird, and roast at 450°F. Cook time drops from 75 minutes to 45 minutes and the skin crisps evenly because every square inch faces the oven heat. A pair of Kitchen Shears is the $20 tool that makes this trivial.
3) Grill (boneless or bone-in, 8-25 minutes)
Grilling adds smoke and char that you can't replicate on a stove. Two-zone fire is the only rule: hot side (direct heat, 450-500°F) for searing, cool side (indirect, 325-375°F) for finishing. For boneless cuts, sear 2-3 minutes per side over direct heat, then move to indirect until 160°F internal. For bone-in, sear briefly, then spend most of the cook time over indirect heat with the lid closed.
Grilled Citrus-Marinated Chicken Skewers with Herb Yogurt Dip is the lowest-friction entry — skewers cook in 8 minutes total and the acid marinade does the heavy lifting on flavor. Citrus-Marinated Grilled Chicken Fajitas with Peppers and Onions scales the same approach to feed six off one grill.
A note on marinades: acid-heavy marinades (citrus, vinegar, yogurt) should top out at 2 hours for boneless cuts, 4 hours for bone-in. Past that, the acid starts denaturing the surface proteins and you get a mealy, slightly cottony texture. Salt and oil-based marinades can go overnight.
4) Braise (any cut, 45-120 minutes)
Braising is forgiveness in cooking form. Sear the chicken, add aromatics, deglaze with stock or wine, cover, drop to a low simmer, and walk away for an hour. You cannot overcook braised chicken in any meaningful sense — thighs at 195°F are more tender than thighs at 165°F because the collagen has fully broken down into gelatin.
Tuscan-Style Chicken with Spinach and Sun-Dried Tomato Sauce and Chicken Tikka Masala are both 1-hour braises that produce restaurant-quality results on a Tuesday. Real Chicken and Dumplings is the long-form version — 2 hours, but most of it is unattended and the result is a single dish that feeds six.
A heavy-bottomed Dutch Oven is the one piece of Cookware that pays back the most across techniques. It sears, it braises, it roasts whole birds, and it transitions cleanly from stovetop to oven without warping. A 5-7 quart enameled cast iron model is the right size for most households.
5) Poach (boneless cuts, 12-15 minutes)
Poaching is the technique everyone forgets and most professionals use. Submerge boneless chicken in seasoned, barely-simmering liquid (175-180°F, just below a simmer), cook 12-15 minutes for breasts or 18-22 minutes for thighs, pull when internal hits 160°F. The result: chicken that's juicier than any other method, perfect for chicken salad, sandwich filling, or stripping for tacos.
The trick is the temperature of the liquid. A rolling boil destroys boneless chicken in about 4 minutes; a gentle 175°F poach is impossible to mess up. Use a Probe Thermometer clipped to the side of the pot if you can't eyeball the simmer level.
Za'atar-Spiced Chicken Shawarma Wraps with Pickled Turnips and Honey-Glazed Chicken Thighs with Garlic and Thyme both benefit from a pre-poach step when you want to guarantee tenderness before the final sear or roast.
Doneness: 165°F at the thickest part (and why it matters)
The single most important number in chicken cookery is 165°F internal. That's the USDA-mandated minimum for safe consumption — at that temperature, instantaneous reduction of Salmonella and other pathogens is guaranteed. The catch is instantaneous. The USDA's own pasteurization tables show that 150°F held for 3 minutes accomplishes the same pathogen reduction, which is why sous vide chicken at 140-150°F is safe and significantly more tender.
For home cooks who aren't using sous vide, the practical rule is: pull at 160°F, rest 5 minutes. Carryover heat finishes the job at 165°F while keeping the meat juicier than if you'd left it on the heat the whole way. A 5°F overshoot doesn't matter; a 15°F overshoot turns dinner into shoe leather. The difference between great chicken and dry chicken is literally 10 degrees.
Dark meat (thighs, drumsticks) is more forgiving. Connective tissue in the legs starts breaking down around 165°F and finishes around 175°F. Pulling thighs at 175-180°F produces a more tender result than pulling at 165°F. The Serious Eats — Pan Seared Chicken Breasts writeup walks through the science in more detail and is worth bookmarking.
How to actually measure:
- Stick the probe into the thickest part, parallel to the bone (not touching it — bone reads hotter than meat). For breasts, that's the thickest part of the lobe. For thighs, that's directly above the joint where the meat is densest. For whole birds, check both breast and thigh.
- An instant-read thermometer is the $15 upgrade. Thermapen ($100) is faster, but a $15 ThermoPro will get you within 2°F in 5 seconds and that's enough.
- Visual cues lie. "Juices run clear" is unreliable — they can run clear at 145°F and still cloudy at 170°F. "It's no longer pink" is unreliable — pink can persist near the bone even after pasteurization. Use the thermometer.
25 chicken recipes from our catalog
These 15 anchor recipes cover every major cuisine and technique. They're also the recipes the rest of the chicken cluster on AislePrompt builds from — start here, then branch into the regional variations linked from each.
Quick weeknight (under 30 minutes)
- Pan-Seared Chicken Breast with Garlic and Rosemary Pan Sauce — the canonical pan-sear, with the technique broken down step by step
- Sautéed Lemon Pepper Chicken with Garlic Herb Sauce — bright, fast, pairs with anything
- Honey-Glazed Chicken Thighs with Garlic and Thyme — the sweet-savory weeknight default
- Chicken Piccata — capers, lemon, butter, 25 minutes start to finish
Sheet-pan and one-pan
- Sheet Pan Maple-Glazed Chicken and Veggies — the lowest-cleanup full meal in the catalog
- One-Pan Greek Lemon Chicken with Olives and Tomatoes — Mediterranean flavors, single roasting pan
- Low-Carb Baked Chicken with Parmesan and Italian Herbs — the keto/low-carb workhorse
Grill and skewer
- Grilled Citrus-Marinated Chicken Skewers with Herb Yogurt Dip — 8 minutes on the grill, summer-meal-ready
- Citrus-Marinated Grilled Chicken Fajitas with Peppers and Onions — feeds six off one grill
Roast
- Best-Ever Crispy Roasted Chicken Thighs — the no-fail entry point to oven roasting
Braise and slow-cook
- Tuscan-Style Chicken with Spinach and Sun-Dried Tomato Sauce — creamy, rich, 45 minutes
- Chicken Tikka Masala — the gateway curry, deeply spiced, perfect with basmati
- Pan-Seared Chicken with Creamy Mushroom Marsala Sauce — Italian-American classic, wine-forward
- Real Chicken and Dumplings — 2-hour Sunday dinner that feeds the week
Sandwich / wrap
- Za'atar-Spiced Chicken Shawarma Wraps with Pickled Turnips — Middle-Eastern lunch, hand-held
Beyond these 15, AislePrompt's catalog includes another 600+ chicken recipes spanning Southern fried, Korean fried, jerk, mole, kung pao, satay, coq au vin, chicken & rice variations from a dozen cuisines, and several hundred regional weeknight one-pots. Use the chicken tag on the recipe browser to explore — the recipes above are the canonical starting points for each technique.
Common chicken mistakes (overcrowding, undersalting, slicing too soon)
Five mistakes account for 90% of "why did my chicken come out bad?" questions:
1. Overcrowding the pan. When chicken pieces touch each other, they trap steam between them and the surface stops browning. The pan temperature drops, the proteins seize, and you end up with grey, rubbery chicken instead of golden-brown crust. Rule: 1 inch of clear space between pieces. If the pan is full, do two batches.
2. Undersalting. Most home cooks use about a third of the salt that restaurant cooks do. For boneless chicken, the right amount is roughly 1 tsp Diamond Crystal kosher salt per pound (3/4 tsp if using Morton kosher; 1/2 tsp if using Diamond fine sea salt — the volume varies by crystal size). For a whole bird, double that and apply 24 hours ahead. Without enough salt, even perfectly-cooked chicken tastes flat.
3. Cooking from cold. Pulling chicken straight from a 38°F fridge and dropping it on the heat means the outside hits 165°F long before the inside catches up. Let boneless pieces sit out for 15 minutes; whole birds for 30-45 minutes. Room-temperature chicken cooks faster and more evenly.
4. Slicing without resting. Cut into chicken the instant it comes off the heat and the juice that should have stayed in the meat ends up on the cutting board. A 5-minute rest under loose foil lets the juices redistribute. For whole birds, rest 15-20 minutes — you'll lose at least 1/3 of the juice by carving immediately.
5. Skipping the thermometer. The single biggest correlation with "I always overcook chicken" is "I don't own an instant-read thermometer." Visual cues are unreliable; cook times depend on too many variables (thickness, starting temp, pan, stove). A $15 thermometer takes the guesswork out and pays back the first time it saves a dinner.
When NOT to cook chicken (the no-fit case)
A few situations where chicken is the wrong tool:
- Long, low-temperature smoke (8+ hours): chicken doesn't have the connective tissue or fat marbling that benefits from a brisket-style cook. Pork shoulder or beef brisket are the right calls. Smoke chicken for 1-2 hours max at 250-275°F if you want smoke flavor.
- Carpaccio / tartare / anything raw: chicken is one of the highest-risk proteins for Salmonella and Campylobacter. Beef and tuna are the only safe options for raw preparations at home.
- Showcase-cut steakhouse plating: when you want a single slab of protein to be the visual center of a plate, beef ribeye, duck breast, or lamb chop all do the job better. Chicken excels at integration with other ingredients, not standing alone.
- Sub-$3/lb budget meal at scale: ground turkey, eggs, and pork shoulder are all cheaper per gram of protein. Chicken is mid-priced, not bottom-priced.
If you find yourself using chicken because "it's what's in the fridge" and the result is bland, that's the signal: either upgrade the technique (sear harder, salt heavier, braise longer) or switch proteins for the night.
Real-world numbers: what to expect
Some concrete benchmarks for the home cook who wants to know if their chicken is on track:
| Cut | Starting weight | Cooked weight (yield) | Cook time | Internal pull temp |
|---|---|---|---|---|
| Boneless skinless breast (8 oz) | 8 oz | ~6 oz | 8-10 min total | 160°F |
| Boneless skinless thigh (5 oz) | 5 oz | ~4 oz | 10-14 min total | 165°F |
| Bone-in skin-on thigh (7 oz) | 7 oz | ~5.5 oz | 35-40 min at 425°F | 175°F |
| Whole spatchcocked (4 lb) | 4 lb | ~3 lb | 45-55 min at 450°F | 160°F breast / 175°F thigh |
| Wings (24 pieces / 2 lb) | 2 lb | ~1.5 lb | 35-40 min at 425°F | 175°F |
Yield drops roughly 20-25% from raw to cooked. If you're shopping for 1 lb of cooked chicken (4 modest portions or 3 substantial ones), buy 1.25-1.4 lb raw.
Caloric numbers worth memorizing: a 4 oz cooked boneless skinless chicken breast is about 165 calories and 31 grams of protein — the highest protein-per-calorie ratio of any common meat (Eat Right — Cooking Poultry Tips). A boneless skinless thigh is ~210 calories and 26 grams of protein for the same weight; bone-in skin-on thigh is ~280 calories and 24 grams of protein.
A practical starter kit
If you cook chicken once a week, four pieces of Kitchen Tools cover essentially every recipe in this guide and most of the rest of the catalog:
1. 8-inch chef's knife ($40-100). Breaks down whole birds, slices cooked chicken, dices vegetables. The single most-used tool in any kitchen. See our Knives category for the picks.
2. 12-inch cast iron skillet or heavy stainless pan ($30-50). Searing, pan-roasting, transitioning to the oven. Cookware in general is high-leverage; see Cookware for the comparison.
3. Instant-read thermometer ($15-100). Non-negotiable. Even the cheap ones are accurate enough.
4. Half-sheet pan with wire rack ($25 for both). Roasting thighs, baking wings, resting cooked chicken — three jobs, one piece of gear.
That's $110-275 for a kit that lasts a decade and turns chicken from a coin-flip into a known quantity.
FAQ
The frequently-asked-questions block at the bottom of the page covers the most common chicken questions; if your situation isn't covered there, the USDA chicken safety page is the authoritative reference for everything food-safety-related.
Related guides
- Looking for the underlying knife skills? Our Knives category guide covers what to look for in a chef's knife, how to maintain it, and the four cuts that cover 90% of home cooking.
- For the cookware decisions that pair with these techniques, see the Cookware overview.
- Outbound sources cited above: USDA Food Safety Inspection Service, Academy of Nutrition and Dietetics — Cooking Poultry Tips, Serious Eats — How to Cook Chicken Breasts.
As of 2026, chicken remains the most-cooked protein in America and the cheapest reliable source of complete protein for most households. Get the technique right once, stop relying on visual cues, and dinner becomes a 12-minute exercise instead of a 30-minute one.
Frequently asked questions
What internal temperature should chicken be cooked to?
Chicken breast vs. chicken thigh — which is better?
How do I keep chicken breast from being dry?
How long does cooked chicken last in the fridge?
Is organic chicken worth the extra cost?
Sources
Plan a week of meals in two minutes.
Tell our AI what you have and what you like — it builds your plan, shopping list, and Instacart cart. No account needed.
Try free →