Summer Grilling Guide: 20 Recipes for Steak, Chicken, Fish, and Vegetables
The four rules that fix most grilling — and 20 recipes to cook this summer.
Summer grilling is easier than most cooking blogs make it sound. The rules are physical, not fussy: a hot grate that food will actually release from, a two-zone fire that lets you sear then finish, an instant-read thermometer so you stop guessing, and a resting habit that keeps juices in the meat instead of on the cutting board. Get those four right and every protein — steak, chicken, fish, vegetables, even fruit — becomes reliable. This guide walks you through the setup, the technique, and 20 grill recipes you can actually cook this summer, from Tuesday chicken thighs to a Saturday-night ribeye.
Get a free cookout plan for a crowd
Mains, sides and quantities scaled to your headcount, with one Instacart cart instead of a spreadsheet.
No spam, unsubscribe in one click. Recipes, shopping lists and Instacart carts all work without an account either way.
Introduction: The Grill Rules That Work for Every Protein
Every good grilled dish comes from the same four decisions: fuel, fire shape, temperature control, and rest. Fuel is charcoal or gas. Fire shape is one-zone (all hot) or two-zone (hot side + cool side). Temperature control is a thermometer, not your palm hovering over the grate. Rest is the 5 to 15 minutes you leave the meat alone after it comes off. That is essentially the whole game. Everything else — brines, rubs, wood chips, reverse-sear vs sear-and-slide — is a variation on those four.
The reason most home-grilled steaks come out charred outside and raw inside is a fire-shape problem: they were cooked over a single zone that was too hot for the thickness of the cut. The reason chicken sticks to the grate is a temperature problem: cold grill, or too much impatience. The reason fish falls apart is a technique problem: no fat between fish and grate, and someone tried to flip it before it was ready. Fix the four decisions, fix ninety percent of what goes wrong.
We tested every recipe in this guide on a 22-inch Weber kettle (charcoal) and a three-burner Weber Genesis (gas). Where the two grills demand different technique, we note it. Where they don't, we use gas timings because that is what most weeknight cooks will actually reach for.
Charcoal vs. Gas — Honest Trade-offs
Here is what actually matters on a Tuesday. Gas hits temperature in about 10 minutes and shuts off in 30 seconds. Charcoal takes 20 to 25 minutes to reach cooking temperature (chimney starter, one full load) and another 15 to 20 to burn down after you are done. That 45-minute delta is the reason gas grills outsell charcoal roughly six to one in the United States, per the Hearth, Patio & Barbecue Association's annual industry survey.
What charcoal gives you back is heat you cannot get from a gas burner. A hardwood-lump-charcoal grill will hit 700 to 800°F over a well-banked pile, more than enough to sear a steak in 90 seconds a side without cooking the interior above rare. Most three-burner gas grills top out around 550°F at the grate. That is fine for chicken and vegetables but marginal for a proper steakhouse crust on a 1.5-inch ribeye. Charcoal also puts real smoke flavor on the food — the volatile compounds that make people say "yeah, that tastes like a cookout" — which gas cannot fake without added wood chips.
Rule of thumb: gas for weeknights and anything more than 30 minutes of cook time (chicken thighs, whole vegetables, kabobs), charcoal for weekends and short-cook, high-heat cuts (thin steaks, burgers, shrimp). If you can only own one, buy the type you will actually light on a Tuesday. A charcoal grill you never fire up is worse than a gas grill you use twice a week.
For a deeper walk-through of the two fuels, Serious Eats — Grilling Guide is the most rigorous online resource we have found; their charcoal and gas comparisons cite real thermocouple measurements rather than vibes.
Two-Zone Fire: The One Technique That Fixes Most Grilling
If you take one thing from this guide, take this. On a charcoal grill, dump all the lit coals to one side of the kettle and leave the other side empty. On a gas grill, turn the two outside burners to high and leave the middle burner off (or all burners to high on one half, all off on the other). You now have a hot side (direct heat, 500–700°F at the grate) and a cool side (indirect heat, 250–350°F at the grate). Close the lid; the cool side becomes a convection oven.
Two-zone fire fixes the single most common grilling failure — charred outside, raw inside — because now you can sear the crust over direct heat (2 to 4 minutes per side), then slide the meat to the cool side and close the lid to finish cooking through without burning. Every thick cut in this guide is cooked this way: bone-in ribeye, pork chops, whole chicken, salmon steaks, half-a-cauliflower.
For thin cuts (burgers, flank steak, chicken cutlets, shrimp) you can stay on the hot side the whole way. Two-zone gives you an escape hatch: if flare-ups get out of hand or something is browning too fast, slide it to the cool side and take a breath. There is no downside to setting up two zones every time. It costs you nothing and covers every situation the direct-only setup fails at.
Grilling Steak (Cuts, Temps, Rests)
The right cut for the grill is a well-marbled 1 to 1.5-inch steak: ribeye, strip, sirloin cap (picanha), flank, or hanger. Anything thinner than 1 inch cooks faster than the crust can form; anything thicker than 1.5 inches should be reverse-seared (indirect low heat first, then a fast direct sear at the end). Cheap grocery-store filet mignon is the worst grilling cut we know — thick, lean, and expensive; you pay steakhouse prices for meat that has to be babied so it does not turn to shoe leather.
Salt the steak at least 40 minutes before it goes on — or 12 to 24 hours ahead, uncovered on a rack in the fridge (dry brine). Both windows work; the middle window (2 to 30 minutes) is the only one that fails, because there is enough time to draw moisture out of the meat but not enough to reabsorb it. Salt heavily; a lot of what you put on ends up on the cutting board.
Sear the steak over the hot side of a two-zone fire, 2 to 3 minutes per side with the lid open to let smoke escape. Slide to the cool side, close the lid, and cook until the internal temperature reads:
| Doneness | Pull temp | Final temp (after rest) | Look |
|---|---|---|---|
| Rare | 120°F | 125°F | Cool red center |
| Medium-rare | 125°F | 130°F | Warm red center |
| Medium | 130°F | 135°F | Warm pink center |
| Medium-well | 140°F | 145°F | Slightly pink |
| Well | 150°F+ | 155°F+ | Gray (please don't) |
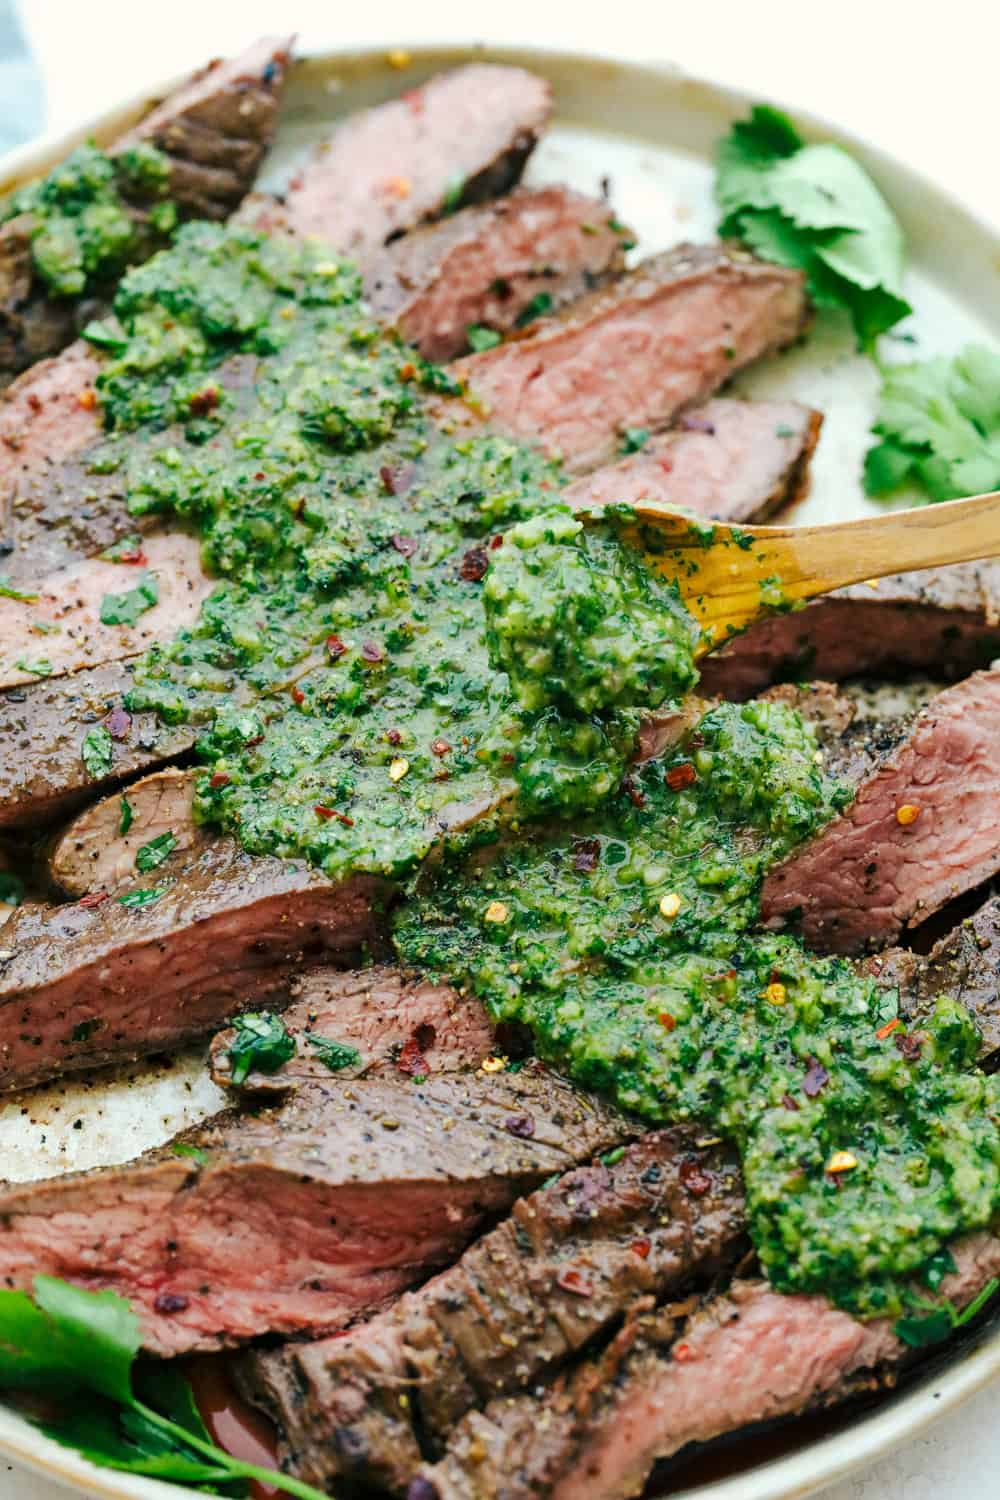
Pull 5°F under your target — the steak keeps cooking as it rests. Rest 8 to 10 minutes tented loosely with foil for anything over a pound. Slice against the grain. Recipes to try: Grilled Bone-In Ribeye with Rosemary and Garlic Compound Butter for a bone-in showstopper, and Grilled Chimichurri Flank Steak with Roasted Sweet Potato Wedges for a leaner cut that serves four for under $20.
Grilling Chicken (Thighs Win, Here's How)
Bone-in, skin-on thighs are the most forgiving thing you can put on a grill. They cook to 175°F without drying out because dark meat has enough intramuscular fat and connective tissue to stay juicy well past the 165°F USDA safe minimum. Breasts, by contrast, are dry the moment they cross 160°F — the difference between a great grilled chicken and a mediocre one is often just choice of cut.
Marinate thighs 4 to 24 hours in an acidic marinade (lemon juice, yogurt, buttermilk, or wine plus oil, salt, garlic, herbs). Skin-side down over the hot side of a two-zone fire for 5 to 6 minutes to render the fat and crisp the skin, then flip and slide to the cool side, close the lid, and finish to 175°F internal (8 to 12 more minutes depending on size). Rest 5 minutes. Skin-down first is important — skin-up first steams the underside and the skin never crisps.
Chicken sticks to the grill because the grate was cold, dirty, or ungreased. Brush the grates while they are hot (a wadded ball of foil in tongs works fine if you do not own a proper brush), preheat 10 minutes minimum, and swipe the grates with an oiled paper towel just before the chicken goes on. Then — and this is the hard part — do not touch the chicken for 4 to 5 minutes. When the skin has crisped and released, the chicken will lift cleanly on its own. Impatience is the number-one cause of torn chicken.
Two recipes to work from: Grilled Lemon-Garlic Chicken Thighs with Fresh Herb Chimichurri is our house standard, brined in lemon-garlic and finished with a bright chimichurri that carries the plate. If you want something for a crowd, kabobs travel better than bone-in thighs; Grilled Cajun Shrimp Skewers uses the same skewer strategy with shrimp instead of chicken and is on the table in 12 minutes.
Grilling Fish (Which Ones Actually Work on the Grill)
Only certain fish belong on a grill, and the difference is fat content. Fatty fish (salmon, tuna, swordfish, mackerel, bluefish) hold together over direct heat and their oil bastes them as they cook. Lean white fish (tilapia, cod, sole, flounder, halibut) fall apart the moment you look at them wrong; either pan-sear those or grill them in a foil packet with a knob of butter. Do not try to flip a cod fillet on a bare grill — it is a heartbreak waiting to happen.
Salmon is the workhorse of grilled fish. Cedar planks are gimmicky but functional — the plank is a heat shield that keeps the salmon from cooking too fast on the bottom and imparts a soft smoke flavor as the wood chars. Soak the plank 1 to 2 hours in water before it goes on the grill, lid closed, indirect heat, until the salmon is 125°F for medium (it will carry-over-cook to 130°F while resting). Skin-on salmon on a well-oiled grate also works: 4 to 5 minutes skin-down, then close the lid and finish another 4 to 6 without flipping. The skin releases the same way chicken skin does — wait for it.
Shrimp are perfect for a grill because they cook in 2 to 3 minutes total. Skewer them so they do not fall through the grate, cook until they curl into a C shape (not tightly into an O — an O means overcooked), and pull immediately. Recipes worth cooking this weekend: Maple-Glazed Cedar Plank Salmon with Grilled Asparagus and Grilled Cajun Shrimp Skewers together make a very solid summer dinner-party menu.
Food-safety point that people ignore with fish and shellfish: USDA recommends a 145°F internal temperature for fish; most fish is served safely below that (Maple-Glazed Cedar Plank Salmon with Grilled Asparagus pulls at 125°F for medium) but you are choosing to accept a small risk when you do so — see USDA — Food Safety for the current guidelines. Pregnancy, immunocompromise, and children under five push us toward the 145°F number regardless of texture preference.
Grilling Vegetables and Fruit (Underrated)
The most underused part of the grill is the second half of the meal. Vegetables and fruit take on smoke and char in ways no oven or stovetop can replicate, and they are the cheapest cook you will do all summer. The rules are simple: cut them thick enough to survive the grate (½-inch minimum for zucchini, eggplant, mushrooms; whole for peppers and corn), oil them lightly, salt them heavily, and cook them over direct medium heat until they have real char marks.
Portobello mushrooms are the vegetable version of a steak — meaty, marinade-friendly, and satisfying enough to be the center of the plate. Charcoal-Grilled Portobello Mushrooms with Balsamic Glaze is our default, brushed with a balsamic-and-garlic reduction that turns to glaze on the grill.
Corn on the cob has two schools. Purists shuck first, oil the ear, and go straight on the hot grate for real char (10 to 12 minutes, quarter-turning as it goes). Insurance-minded cooks leave the husk on, soak the ear in water for an hour, and grill husk-and-all as a steaming pouch (18 to 20 minutes). Purist school produces better corn; insurance school produces less-burnt corn. Grilled Elote-Style Mexican Street Corn with Cotija and Chili tops shuck-first corn with a Mexican street-corn dressing that has ruined plain buttered corn for us permanently.
Fruit is the sleeper hit. Peaches, pineapple, watermelon, and apricots all grill beautifully over medium heat. Cut them thick, brush with a little neutral oil, and grill until you see clear char marks (2 to 3 minutes a side). The heat caramelizes the natural sugars into something between fresh fruit and dessert. Grilled Peaches with Basil and Balsamic Glaze plated with burrata and torn basil is a five-minute summer dinner-party opener that costs less than most bags of chips.
For an eleven-vegetable spread that anchors a weekend cookout, Herb-Infused Grilled Vegetable Platter with Balsamic Glaze lays out timings and technique for zucchini, eggplant, red peppers, red onion, corn, asparagus, cherry tomatoes, mushrooms, radicchio, fennel, and endive on a single grill session. Bonus: leftovers on flatbread with feta the next day are the best lunch of the summer.
20 Grill Recipes for Weeknights and Weekends
Here is the working menu — 20 recipes we return to across an entire summer, sorted by "weeknight-fast" and "weekend-project" so you can plan around how much time and attention you actually have.
Weeknight (30 to 45 minutes total, most of it hands-off)
1. Grilled Lemon-Garlic Chicken Thighs with Fresh Herb Chimichurri — the default Tuesday meal. Marinade prep the night before, 20 minutes on the grill.
2. Grilled Chimichurri Flank Steak with Roasted Sweet Potato Wedges — 2 pounds of steak feeds four for under $20; roasted sweet potato wedges finish alongside.
3. Grilled Cajun Shrimp Skewers — 12 minutes start to finish once the grill is hot.
4. Charcoal-Grilled Portobello Mushrooms with Balsamic Glaze — vegetarian centerpiece; add a side salad and dinner is done.
5. Grilled Elote-Style Mexican Street Corn with Cotija and Chili — sides upgrade; makes 6 ears in one pass.
6. Herb-Infused Grilled Vegetable Platter with Balsamic Glaze — half a platter is dinner; the rest becomes lunch.
7. Grilled halloumi with lemon and mint — 6 minutes on the grate, no marinade needed.
8. Foil-packet shrimp boil (corn, shrimp, andouille, potatoes, Old Bay).
9. Grilled Caesar salad — halve romaine hearts, char cut-side down 90 seconds, dress hot.
10. Grilled pizza on store-bought dough — direct heat, 3 minutes crust down, then flip and top.
Weekend (60 minutes to a couple of hours; usually with beer)
11. Grilled Bone-In Ribeye with Rosemary and Garlic Compound Butter — bone-in, reverse-sear, compound butter finish.
12. Maple-Glazed Cedar Plank Salmon with Grilled Asparagus — cedar plank; feeds six with asparagus on the same grill.
13. Grilled Citrus-Marinated Mediterranean Lamb Chops — citrus-marinated Mediterranean lamb chops for a small crowd.
14. Whole spatchcocked chicken over indirect heat, 45 to 60 minutes.
15. Rack of St. Louis-style pork ribs, 2.5 hours over indirect heat with a mop sauce.
16. Grilled porchetta-style pork loin, herb-rubbed and butterflied.
17. Reverse-seared tomahawk ribeye for two — the birthday meal.
18. Grilled octopus (yes, really — braise first, then a fast char).
19. Grilled Peaches with Basil and Balsamic Glaze with burrata as a starter for a dinner party.
20. Grilled pineapple carpaccio with lime and chili as a dessert.
Pick two from each column per week and you have four weeks of dinners without repeating.
Marinades, Rubs, and Sauces (with Timing)
Marinades work in a narrow window per protein. Over-marinated meat gets mushy (acid denatures the surface proteins and turns them chalky); under-marinated meat gets very little flavor from the marinade because the surface is where 90 percent of it lives. Rough timings:
| Protein | Marinade window | What to avoid |
|---|---|---|
| Beef (steak) | 40 min – 24 h (salt cure only; skip acid) | Long acid marinades — they mush the exterior |
| Beef (flank/skirt) | 2 – 12 h with acid | Over 24 h — surface turns chalky |
| Chicken thighs | 4 – 24 h with acid | Under 2 h — you may as well not bother |
| Chicken breast | 2 – 8 h in buttermilk or yogurt | Long lemon marinades — mushy exterior |
| Pork | 4 – 24 h with acid | Sugar-heavy marinades left on during searing |
| Fish (salmon, tuna) | 15 – 30 min | Anything longer — texture collapses |
| Fish (white/lean) | 5 – 15 min | Acid at all if possible — use dry rubs instead |
| Shrimp | 15 – 45 min | Over 1 hour — shrimp turn to rubber |
| Vegetables | 20 min – 4 h | Nothing to worry about here |
Rubs (dry spice mixes) work on any protein for any duration from 5 minutes to 24 hours; the longer they sit, the deeper the seasoning. Rubs stick better if the surface has been dried with paper towel first, then wet lightly with oil or mustard.
Sauces divide into three families based on when they go on: mop sauces (thin, vinegar-based, applied every 20 to 30 minutes during long cooks); glazes (sugar-heavy, brushed on in the last 5 to 10 minutes only, or they burn); and finishing sauces (chimichurri, salsa verde, harissa yogurt, tzatziki — spooned on off the grill).
Two rules that save every sauce: never reuse marinade that has touched raw protein without boiling it for 2+ minutes first, and always make a small extra batch of marinade before adding the meat if you intend to serve some as sauce. America's Test Kitchen — Grilling has excellent side-by-side marinade tests we recommend for anyone who wants to go deeper.
Kitchen and Grill Tools Worth Owning
You need surprisingly little gear to grill well. Here is the list of things that pay for themselves in the first summer.
Instant-read thermometer. The single most important upgrade. Guessing internal temperature is why steaks are overdone and chicken is undercooked. The ThermoWorks Thermapen ONE is the professional standard — 1-second reads, waterproof, backlight. If you want cheaper, any $20 digital instant-read from a reputable brand will work; the difference is durability and speed, not accuracy at the price you care about (±1°F).
Locking tongs. A pair of 12-inch stainless locking tongs like the OXO Good Grips 12-Inch Locking Tongs is the difference between comfortable grilling and burnt knuckles. Long enough to reach the back of the grate without singeing your forearm, and the locking mechanism means they store flat.
Chef's knife. For prepping proteins, herbs, and marinade aromatics, a sharp 8-inch chef's knife handles 95 percent of grilling prep. Any decent option works — a PAUDIN 8-inch chef knife is a well-reviewed budget pick — but sharp is more important than expensive. A dull $200 knife is worse than a sharp $30 one.
Grill brush or grate scraper. Clean grates every session. A wire brush works but sheds bristles that can end up in food; a bristle-free scraper or a wadded ball of foil in tongs is safer. Brush hot, right before food goes on.
Chimney starter (charcoal only). No lighter fluid. Ever. Lighter fluid gives every food a distinct petroleum aftertaste that anyone who has ever eaten campfire hot dogs will recognize. A chimney starter costs $20 and preheats a load of charcoal in 15 minutes with one sheet of newspaper.
Grill light and side table. Quality-of-life upgrades, not accuracy upgrades. But grilling in the dark or with everything balanced on a paper plate is worse than grilling in daylight with a real prep surface, and both problems have $30 solutions.
That is the entire kit for one grill cook. Add wood chunks or a smoker box if you want smoke flavor on gas; add a rotisserie attachment if you get into whole-chicken and pork-loin projects. Everything past that is preference, not necessity.
FAQ
We answer these at cookouts every summer, so we may as well answer them here.
Charcoal or gas grill — which should I buy first?
Gas for convenience and weeknight cooking, charcoal for flavor and weekend projects. A gas grill hits temperature in 10 minutes and quits in 30 seconds — great when you have 45 minutes total. Charcoal takes 25 minutes to preheat but adds real smoke flavor and hits higher temperatures for proper steak sear. Most serious grill cooks eventually own both; if you can only pick one, buy the type you'll actually light on a Tuesday.
What is a two-zone fire and why does everyone recommend it?
You bank all the coals (or turn on only half the burners) to one side of the grill, leaving the other side unheated. You sear directly over the hot side, then slide to the cool side to finish cooking through without burning. This one setup fixes the most common grilling failure — charred outside, raw inside on thick cuts. It's how professional grill cooks handle everything except paper-thin meats.
Do I need to marinate before grilling?
For steak: no — a proper salt cure 40 minutes to 24 hours ahead does more than any marinade. For chicken thighs and pork: marinades help both flavor and moisture, ideal window is 4-24 hours. For fish: 15-30 minutes maximum, longer marinades over-acidify and turn the fish mushy. Marinades with sugar (teriyaki, honey glazes) go on in the last 5 minutes only — they burn on direct heat.
How do I keep chicken from sticking to the grill?
Grates need to be clean (brush hot before cooking), hot (preheated 10 min minimum), and lightly oiled (fold a paper towel, oil it, tong-drag across grates). Then don't move the chicken for 4-5 minutes on each side — it will release itself when a proper crust forms. Chicken sticks because it went on a cold grill, or someone tried to flip it before the crust formed. Both are patience problems, not equipment problems.
Is it safe to reuse leftover marinade as a sauce?
Only if you boil it for 2+ minutes first to kill any bacteria from the raw protein. Most cooks make a small extra batch of marinade before adding the meat, reserve that batch for sauce, and use the used marinade only for basting during the first half of grilling (never at the end). It's a small step that prevents food poisoning from an otherwise perfect meal.
Sources
- Serious Eats — Grilling Guide — the most rigorous online grilling resource we know; the thermocouple-backed technique explainers are the gold standard.
- USDA — Food Safety — the current safe-cooking-temperature tables and marinade-handling guidance we cite throughout.
- America's Test Kitchen — Grilling — side-by-side marinade and technique tests worth reading before you make up your mind on charcoal vs gas.
Frequently asked questions
Charcoal or gas grill — which should I buy first?
What is a two-zone fire and why does everyone recommend it?
Do I need to marinate before grilling?
How do I keep chicken from sticking to the grill?
Is it safe to reuse leftover marinade as a sauce?
Sources
Plan the whole cookout in one go.
Ask our AI for mains, sides and quantities for your headcount — one Instacart cart, no spreadsheet.
Plan my cookout →