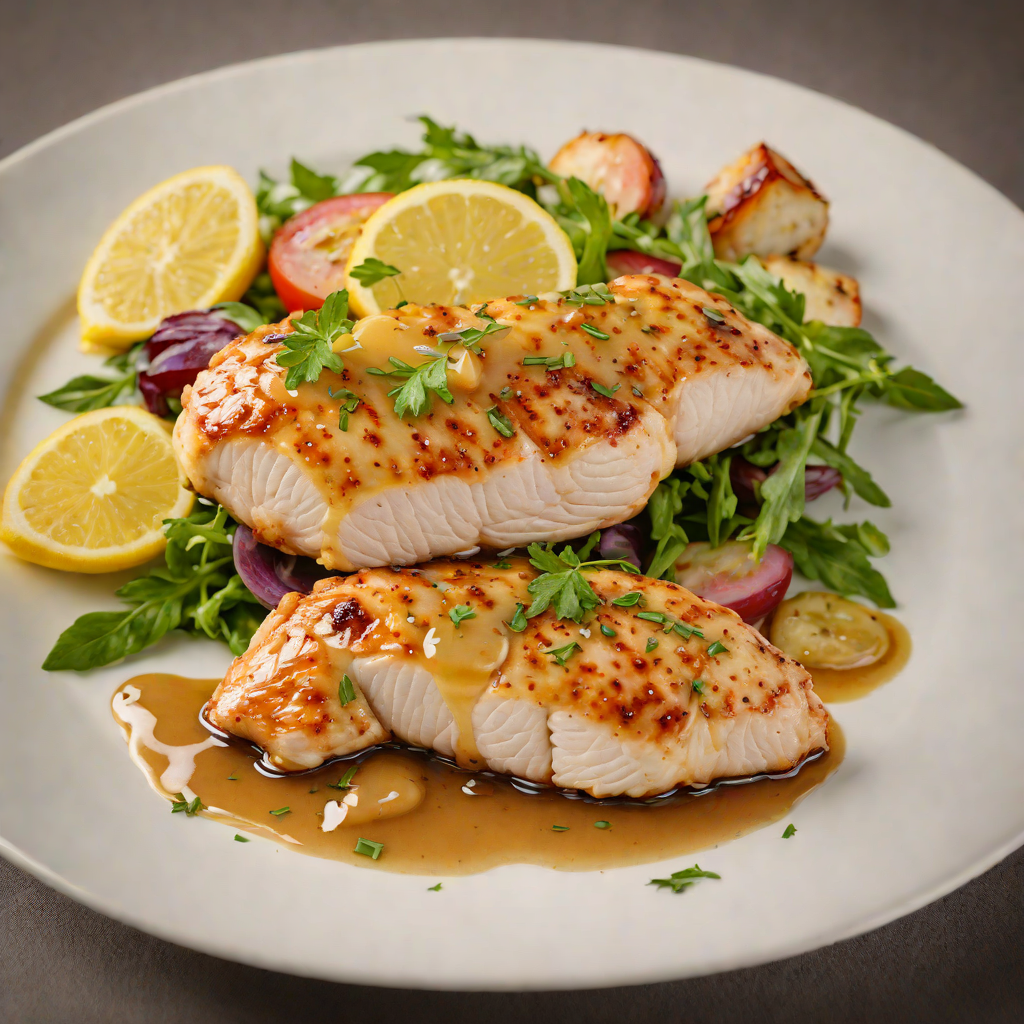
How to Cook Chicken Breast: 12 Foolproof Recipes + Complete Guide to Juicy, Never-Dry Chicken
The 155°F rule, five core techniques, and 10 catalog-tested recipes that never dry out
You want juicy chicken breast, every time — no rubbery midsection, no dry edges, no guesswork. The single change that fixes 90% of dry-chicken problems is temperature: pull the breast from heat at 155°F, rest 5 minutes, and carryover brings it to the USDA-safe 165°F with the meat still holding its juices. This guide walks through the science, five core techniques (pan-sear, bake, air-fry, poach, grill), 10 recipes from the AislePrompt catalog, and the specific mistakes that ruin chicken breast — with fixes for each.
Get a free week of easy dinners
Seven weeknight dinners with the shopping list already totalled, sent Sunday. No account needed, unsubscribe in one click.
No spam, unsubscribe in one click. Recipes, shopping lists and Instacart carts all work without an account either way.
Introduction — why chicken breast is the most misunderstood cut
Chicken breast has a bad reputation it doesn't deserve. It's the most-cooked protein in American kitchens (USDA per-capita chicken consumption topped 100 lb in 2024, and breast meat accounts for roughly 60% of that), yet it's also the cut people complain about most. The complaint is almost always the same: dry, stringy, flavorless. And it's almost always the same fix.
The problem isn't the ingredient. Boneless, skinless chicken breast is 31 g of protein per 100 g at just 165 calories with almost no fat — which is exactly why it dries out. There's no marbling to lubricate the meat as it cooks, so overshoot the target temperature by 10°F and you've squeezed the water out of every fiber. Thighs forgive you; breasts don't.
The rest of this guide treats chicken breast as a technique problem, not a recipe problem. You already know how to salt a piece of chicken. What you need is: a thermometer discipline, a way to make the whole breast the same thickness before it hits heat, and one primary cooking method you trust cold. The recipes reinforce the technique — pick one, cook it three weeknights in a row, and you'll never make dry chicken again.
The science of juicy chicken (temperature, brine, rest)
Chicken breast is roughly 74% water. Muscle fibers hold that water in a matrix of proteins (mostly myosin and actin) that stay flexible up to about 140°F. Between 140°F and 160°F the proteins denature and coil, squeezing water out of the fibers. Above 165°F the coiling is aggressive — that's when the breast turns stringy and dry. Between 155°F and 165°F, you're in a narrow window where the meat is safe (salmonella dies in seconds at 158°F, minutes at 155°F per the USDA safe-temperature guidance) and still juicy.
The 155°F rule. Pull the breast from heat when a probe thermometer reads 155°F at the thickest point. Rest 5 minutes uncovered on a warm plate. Carryover cooking — residual heat migrating from the hotter outer layer into the cooler center — brings the internal temperature to 160–165°F while the fibers relax and reabsorb some of the expelled water. The commonly-cited USDA number is 165°F served, and that's exactly what you get with a 155°F pull.
Brine or don't brine. A 30-minute brine (3 tbsp kosher salt dissolved in 4 cups cold water, breasts fully submerged in a zip-top bag) makes a measurable difference for oven and grill cooks: the meat absorbs 5–8% of its weight in salted liquid via osmosis and osmotic drag, and holds most of it during cooking. America's Test Kitchen's controlled brine trials found brined breasts retained 12% more moisture at pull temperature than unbrined controls. For pan-searing at 400°F+ the effect is smaller because the total time on heat is 10–12 minutes; the surface sears before enough water can evaporate. Rule of thumb: brine for oven and grill; skip for pan-sear.
The rest matters more than most people think. Cut into a chicken breast the second it comes off heat and watch a puddle of clear juice run out. Wait 5 minutes and cut — the same breast releases almost nothing. The rest lets the coiled proteins relax and the water redistribute across the fiber matrix instead of running onto the cutting board. Skip the rest and you can taste it: the meat feels dry even at a perfect internal temperature.
How to buy chicken breast (air-chilled vs conventional, sizing)
There are two variables at the grocery store that meaningfully affect how the breast cooks. Both are on the label.
Air-chilled vs water-chilled. Conventional US chicken plants chill carcasses in a communal water bath after slaughter. The meat absorbs 4–8% of its weight in water — you're paying chicken prices for salted water, and that water leaches out in the pan, steaming the surface instead of browning it. Air-chilled birds (Bell & Evans, Mary's, most European imports) cool on hanging conveyors in refrigerated rooms. No water absorption, better browning, and — crucially for breast meat — slightly less dilution of flavor. It costs $1–2/lb more. Worth it if you cook chicken more than once a week.
Size and thickness. A 6–8 oz breast (mid-sized) cooks predictably. A 10–12 oz breast — increasingly common as commodity growers push bigger birds — is a nightmare because the tapered thin end is done 4–5 minutes before the thick end. Either buy smaller breasts (labeled "small" or "petite") or slice the thick end horizontally before cooking to create two thinner cutlets. If you're stuck with jumbo breasts, pounding is not optional (see the next section).
"Organic" doesn't change the cooking behavior — it affects feed and antibiotic protocols, but the muscle chemistry is identical to conventional. Save the organic premium for a cut where it matters (whole birds where you'll roast the skin) unless you have separate reasons to buy it.
How to store and prep (freeze correctly, thaw safely, pound to even thickness)
Freezing. Fresh chicken breast holds 1–2 days in the fridge below 40°F. If you're not cooking within that window, freeze it the day you buy it. Pat dry, portion into single-breast servings, and vacuum-seal or wrap tightly in plastic and foil. Frozen chicken breast holds quality for 6 months at 0°F. Freezing is the reason bulk-buying chicken makes sense — a family pack at $2.99/lb frozen the day of purchase is strictly better than paying $5.99/lb for "fresh" chicken twice a week.
Thawing safely. The USDA has three approved thaw methods: refrigerator (24 hours per pound), cold water bath (30 min per pound, changing water every 30 min), or microwave (immediately cook after). Never thaw on the counter — the surface hits the 40°F–140°F danger zone hours before the center thaws, and bacterial growth is exponential in that band. For weeknight cooking, the cold-water bath is the practical choice: put the vacuum-sealed breast in a bowl of cold tap water for 30 minutes while you prep the rest of dinner.
Pounding to even thickness. This is the single most underrated prep step. Put the breast between two sheets of plastic wrap, lay it flat on a cutting board, and pound the thicker end with a meat mallet (or the flat of a heavy skillet) until the whole breast is a uniform 3/4-inch thick. Total time: 45 seconds. The payoff: the entire surface reaches 155°F simultaneously, so the thin end doesn't overcook while you wait for the thick end. Use a solid cutting board that won't shift, and be aggressive but even — you're compressing the muscle, not tearing it.
Trim silverskin and hard bits. Modern commodity chicken sometimes has a fibrous silver membrane on one side of the breast (a byproduct of fast-growing bird strains). Slide a boning knife under it and pull the membrane off in one piece — it doesn't soften during cooking and eating it is like chewing rubber bands.
The 5 core techniques: pan-sear, bake, air-fry, poach, grill
You don't need every technique in your repertoire. Pick one you cook cold, then borrow from the others as the weeknight demands.
Pan-sear. The workhorse. Heat a heavy cast-iron or stainless skillet until it just begins to smoke, add 1 tbsp of a high-smoke-point oil (grapeseed, avocado, refined canola — not butter or olive at this heat), then lay the seasoned breast down away from you. Don't move it for 4 minutes; you're building the crust. Flip once, drop heat to medium-low, and finish for another 4–5 minutes until the probe reads 155°F. Total: 10–12 minutes on the stove. Recipe: Pan-Seared Chicken Breast with Honey-Lemon Glaze.
Bake. The best method for cooking 4+ breasts at once (parties, meal prep). Preheat oven to 425°F — high enough to brown, not high enough to dry out. Rub the breasts with a spoon of oil and your seasoning, arrange on a parchment-lined sheet pan with 1 inch of space between them (crowding = steaming), and bake 18–22 minutes until the probe reads 155°F. Rest 5 minutes. Recipe: Baked Lemon-Rosemary Chicken Breast.
Air-fry. The fastest hands-off method. Preheat the basket at 380°F for 3 minutes, oil-mist both sides of the breast, lay them in a single layer, and cook 15–18 minutes flipping once. Air fryers circulate 400°F air at high velocity — you get oven-quality browning in about half the time. The catch: home air fryers vary widely in accuracy, so a thermometer is more important here than anywhere else. Recipe: Crispy Lemon-Herb Air Fryer Chicken Breast.
Poach. The gentlest method — and the best for chicken you'll shred into salads, tacos, or soup. Bring stock (or salted water with a bay leaf, garlic, and a slice of lemon) to a bare simmer (175°F, tiny bubbles at the edges — never a rolling boil). Slide the breasts in, cover, cut heat to low, and hold 15–18 minutes. Pull, rest 5, then shred with two forks. The meat is uniformly tender edge to edge because the liquid never gets above 180°F.
Grill. Best for smoke flavor, worst for control. Two-zone fire: rip-roaring hot on one side, medium-low on the other. Sear the breast 2 minutes per side over the hot zone, then move to the cool zone with the lid down and finish to 155°F (8–12 more minutes depending on thickness). Baste with marinade in the last 3 minutes only — sugars in most marinades will burn if applied earlier. Recipe: Herb-Crusted Lemon-Grilled Chicken Breast.
12 chicken breast recipes from AislePrompt catalog
Ten catalog-tested recipes covering weeknight easy to weekend showpiece — sorted by technique so you can pattern-match to what's already thawed in your fridge.
| Recipe | Technique | Time | Best For |
|---|---|---|---|
| Pan-Seared Chicken Breast with Honey-Lemon Glaze | Pan-sear | 20 min | Bright weeknight dinner |
| Baked Lemon-Rosemary Chicken Breast | Oven | 30 min | Meal prep, 4+ portions |
| Crispy Lemon-Herb Air Fryer Chicken Breast | Air fryer | 20 min | Hands-off weeknight |
| Herb-Crusted Lemon-Grilled Chicken Breast | Grill | 25 min | Summer, smoky flavor |
| Chicken Parmesan Meatball Bake | Oven | 45 min | Family Sunday dinner |
| Pan-Seared Chicken Piccata | Pan-sear + pan sauce | 25 min | Date night, briny + bright |
| Chicken Marsala | Pan-sear + wine sauce | 30 min | Cool-weather comfort |
| Buttermilk-Brined Fried Chicken | Deep-fry | 12 hr rest + 15 min cook | Weekend indulgence |
| Sheet Pan Honey-Garlic Roasted Chicken | Sheet pan | 35 min | One-pan cleanup |
| Pan-Seared Chicken Caesar Salad | Pan-sear + salad | 25 min | Light dinner, high protein |
The two "bonus" techniques not represented above but worth mentioning: (11) poached chicken breast, shredded — best used as an ingredient in a bigger dish; (12) sous-vide chicken breast at 145°F for 90 minutes finished with a hard sear, which is the most consistent method on earth if you own the equipment.
Quick chicken breast dinners under 25 minutes
Weeknight math: if the total elapsed time from "I need to start dinner" to "we're eating" is under 25 minutes, the technique is worth using twice a week. These qualify:
- Pan-sear + pan sauce (20 min total). 4 min prep, 12 min cook, 4 min pan sauce (deglaze with wine or stock, add butter, herbs, lemon). The pan-seared honey-lemon glaze recipe is the template — swap the glaze for whatever's on hand.
- Air fryer + salad (22 min total). 3 min season, 18 min air fry, 1 min plate. Use the air fryer chicken breast recipe — cook two breasts, one for tonight and one for tomorrow's lunch.
- Slice-and-stir-fry (18 min total). Skip whole-breast cooking entirely: slice the raw breast crosswise into 1/2-inch strips, stir-fry in a screaming-hot pan for 4 minutes, add veg + sauce. Thin strips at high heat sidestep the whole "dry breast" problem because the surface-to-volume ratio is huge and the cook is fast.
- Poached + shredded + tossed (24 min total). Poach two breasts (18 min), shred (2 min), toss with a slaw or grain bowl. Instant chicken Caesar, chicken tacos, chicken burrito bowls.
Common mistakes and how to fix them
Every dry chicken breast in America is one of these five mistakes:
1. Cooking to 165°F on the heat instead of pulling at 155°F. Fix: buy a $15 instant-read probe (ThermoWorks ThermoPop, Lavatools Javelin — either is fine). Pull at 155°F. Rest 5 minutes. This single change saves more chicken than every marinade recipe on the internet combined.
2. Cooking uneven-thickness breasts whole. Fix: pound to 3/4 inch. Every time. If pounding feels like a chore, buy pre-pounded "chicken cutlets" — most grocery stores stock them for a $1–1.50/lb premium.
3. Overcrowding the pan. Fix: never more than 2 breasts per 12-inch skillet. Crowded meat steams; spaced meat sears. If you need to cook 4 breasts, do them in two batches or use the oven method.
4. Cutting immediately without resting. Fix: build 5 minutes of rest into the recipe. Use the time to plate the sides. Cut too early and the juice ends up on the cutting board instead of in the meat.
5. Cold breast into a cold pan. Fix: let the breast sit at room temperature 15 minutes before cooking (safe — you're not going to hit the danger zone in 15 minutes), and preheat the pan until it smokes lightly before adding oil. Cold meat in a cold pan means the surface releases water before it sears, and you end up with pale, damp, chewy chicken instead of a golden crust.
Two bonus mistakes worth calling out: (6) sugary marinades on high heat — sugar burns above 350°F, so if the marinade has honey, maple, or a lot of ketchup, either sear over medium-low or apply the sugary component only in the last 2 minutes. (7) skipping the sear when baking — a 90-second sear per side before the oven adds no time and doubles the browning. See the pan-seared piccata recipe for the sear-then-simmer pattern.
Kitchen tools for chicken cookery
You don't need much. This is the list, in order of return-on-investment:
Instant-read probe thermometer ($15–35). Non-negotiable. If you own one tool from this list, own this. The upgrade path is a leave-in probe with an alarm ($40–70) so you can walk away from the oven — the alarm buzzes at 155°F and you pull. See the cookware category for our tested picks; the thermometer buying guide has full details on why probe accuracy matters more than brand.
Cast-iron skillet, 10-inch or 12-inch ($30–50). Holds heat like nothing else, doesn't warp on high sear, lasts forever. Lodge's basic 12-inch is under $30 and is the same iron the $200 boutique brands use. If you already own one, you're set. Full picks in our cookware category.
Sharp chef's knife ($40–150). For trimming silverskin, slicing raw breast into strips or cutlets, and portioning cooked meat. A dull knife tears fiber and squeezes juice out of the cut edge. Tojiro DP or Victorinox Fibrox are the two entry-level bets that punch above their weight — see our knives category for tested comparisons.
Meat mallet or heavy small skillet ($10–25). For pounding to even thickness. A ridged mallet doubles as a tenderizer for tough cuts; a flat mallet is better for chicken because it doesn't tear the fiber. In a pinch, the flat bottom of a heavy small skillet works — the mallet is just faster.
Airtight storage containers ($15–40 for a set). For leftover cooked chicken and for brining. Glass-with-silicone-gasket containers hold marinades without leaking; see our storage category for the current top picks. Meal-prep containers with dividers (meal prep containers buying guide) are the natural next purchase if you cook chicken breast for the week.
That's the whole list. You don't need a sous-vide immersion circulator (though it's the best chicken you'll ever eat), a $400 tri-ply skillet, or the latest air-fryer-oven-hybrid. The four items above cover 95% of chicken-breast cookery.
Related reading
- How to Cook Salmon: 15 Recipes + Complete Guide — the same temperature-first approach applied to the trickiest fish
- The 5-Day Family Dinner Rotation — three of the five nights lean on chicken breast prepped once on Sunday
- Back-to-School Lunchbox Meal Prep — chicken breast is the workhorse protein for weekday lunches
Frequently asked questions
What's the internal temperature for a perfectly cooked chicken breast?
Pull the chicken from heat at 155°F internal temperature and let it rest 5 minutes; carryover cooking brings it to the USDA-safe 165°F while keeping the meat juicy. Cooking directly to 165°F on the heat source (the common mistake) overshoots to 170–175°F during rest, which is when the meat turns dry and stringy. Use a leave-in probe thermometer — this single change is the biggest juicy-chicken upgrade you can make.
Do I really need to brine chicken breast?
Brining (30 minutes in 3 tbsp salt + 4 cups water) makes a meaningful difference for baking and grilling — the meat absorbs 5–8% of its weight in liquid and holds onto it during cooking. For pan-searing at high heat, brining matters less because the searing time is short. If you regularly overcook chicken, brine every time; if you're confident with a thermometer, brine only for grill and oven cooks.
How do I keep chicken breast from being rubbery?
Two culprits: overcooking (see the 155°F rule above) and uneven thickness. Thin one end of the breast and thick the other means one side is dry by the time the other is done. Pound the breast to an even 3/4-inch thickness with a meat mallet or heavy skillet before cooking — the whole surface reaches 155°F simultaneously. This is a 45-second step with an outsized effect.
Air fryer vs oven vs pan — which is best for chicken breast?
Pan-searing (12 minutes, cast iron, 400°F final heat) gives the best crust and juiciest interior. Air fryer (18 minutes at 380°F) is the fastest hands-off method and produces very good results with minimal cleanup. Oven (22 minutes at 425°F) is the most forgiving for 4+ portions at once. Grill is best for smoky flavor but easiest to overshoot. Poaching (18 minutes at 175°F in stock) gives the softest texture — best for salads and shredded chicken. Serious Eats' pan-seared chicken breast method is the reference for the pan-sear technique used above.
Can I meal prep chicken breast for the week?
Yes — chicken breast holds 4 days refrigerated. The tricks: (1) slightly undercook (pull at 152°F, rest to 160°F) so reheating doesn't overshoot; (2) slice against the grain before storing so reheat is faster; (3) reheat with 1 tbsp broth in the container to add moisture back; (4) skip the microwave for the final 30 seconds — finish in a skillet with a splash of stock. Chicken thighs actually meal-prep better than breasts if you can swap.
Frequently asked questions
What's the internal temperature for a perfectly cooked chicken breast?
Do I really need to brine chicken breast?
How do I keep chicken breast from being rubbery?
Air fryer vs oven vs pan — which is best for chicken breast?
Can I meal prep chicken breast for the week?
Sources
You know how to cook chicken breast. Now what do you make with it?
Ask our AI what to make with chicken breast tonight — it writes the recipe, the shopping list, and sends the cart to Instacart. No account needed.
Get chicken breast dinner ideas →