How to Cook Chicken Breast: 20 Recipes + Never-Dry Guide
Brine, pound, thermometer, rest — the four-step playbook plus 20 catalog-tested recipes for the leanest cut on the bird.
Affiliate disclosure: AislePrompt may earn a commission on qualifying purchases made through Amazon and Instacart links in this article, at no additional cost to you. See our affiliate policy →
Cook chicken breast to an internal temperature of 160°F, then pull it from the heat and rest 5 minutes — carryover takes it to the USDA-safe 165°F while the juices redistribute. That single 5°F window is the difference between juicy and sawdust. Everything else in this guide — dry-brining, pounding to even thickness, the right pan, the right oven temp — is just engineering around that target.
What you'll use with it
Dry chicken breast is a few degrees of overcooking, and the only reliable check is a thermometer in the thickest part. The thermometer guide has five picks under $100 and safe temps by protein. Read the instant-read thermometer guide →
Instant-read thermometer guide’s top pick: ThermoMaven Professional Digital Meat Thermometer $19.99 at Amazon, Check price on Amazon →Instant-read thermometer guide’s Best Value pick: Alpha Grillers Digital Instant Read $14.97 at Amazon, Check price on Amazon →Instant-read thermometer guide’s Best for Beginners pick: TempPro TP19 Waterproof Thermocouple $27.99 at Amazon, Check price on Amazon →A thin skillet can’t hold sear heat when cold chicken goes in; a heavy 10–12 inch cast iron pan can. The cast iron guide picks pans that hold heat and explains how to preheat one. Read the cast iron skillet guide →
Cast iron skillet guide’s top pick: Lodge 10.25" Seasoned Cast Iron Skillet $29.90 at Amazon, Check price on Amazon →
If you've been cooking chicken breast the way most home cooks do — boneless skinless breast straight from the package into a hot pan, ten minutes a side, hope for the best — you've been losing the fight before you start. The breast is the leanest cut on the bird (about 3g of fat per 4oz vs 9g for thigh), which means there's no fat reserve to forgive a 5°F overshoot. The good news: chicken breast is also the easiest protein to control once you understand the variables. This guide covers the 20-minute fix (dry-brine + thermometer), two reliable cooking methods, 20 chicken-breast recipes from the AislePrompt catalog you can build a week of dinners around, and the buying decisions that move the needle (and the ones that don't). All verified against the catalog and USDA guidance as of 2026-06-26.
Why home-cooked chicken breast is usually dry (and how to fix it)
Three things, in order of impact: chicken breast cooks fast, has almost no fat to mask a temperature overshoot, and most home cooks rely on visual cues that lie. The breast goes from juicy to dry inside a 10°F window — about 60 seconds at medium-high heat. Miss the window and the muscle fibers contract hard enough to squeeze out a third of the water content, which is what you taste as "dry."
The fix is a three-part recipe that any source you trust will agree on:
1. Dry-brine 1+ hour ahead. Salt the breast (¾ tsp kosher salt per pound), set it on a rack uncovered in the fridge. The salt pulls moisture out, dissolves into a brine, then gets pulled back in seasoning the meat throughout. Overnight is better but 60 minutes is real.
2. Pound or butterfly to even thickness. A whole boneless breast tapers from ~1.5" at the thick end to ~½" at the tail. Cook it as-is and the tail is leather by the time the thick end is safe. Pound the thick end down to ¾" with a meat mallet, or butterfly (slice horizontally through the side) into two even pieces.
3. Cook to 160°F internal, pull, rest 5 minutes. Carryover finishes the cook to 165°F. Use an instant-read thermometer in the thickest part — the USDA's safe-temperature chart confirms 165°F is the kill point, but it's reached instantly at that temp; sustained holding isn't necessary.
That's it. Brine, pound, thermometer. Everything below is a refinement on those three.
Buying guide: organic vs conventional, fresh vs frozen, air-chilled
The chicken aisle is engineered to confuse you. Five labels actually matter; the rest is marketing.
| Label | What it means | Worth the premium? |
|---|---|---|
| Organic | USDA certified — no antibiotics ever, organic feed, outdoor access | If antibiotic resistance is a personal concern, yes. Flavor difference is negligible. |
| Air-chilled | Carcasses chilled with cold air instead of being submerged in a chlorine-water bath | Yes — water-chilled birds absorb 4-12% water weight you pay for and that leaks out in the pan as gray foam. Air-chilled browns better. |
| Pasture-raised | Birds spent meaningful time outside on grass | Modest flavor upside, real ethics upside. Not consistent across brands. |
| Heritage breed | Slower-growing breeds (Cornish Crosses are the supermarket default) | Real flavor difference but cooking time changes. Reserve for whole birds. |
| Fresh vs frozen | "Fresh" can be held just above freezing for 21+ days | Frozen at peak then properly thawed beats "fresh" that's been in transit a week. |
A few rules to shop by:
- Fresh boneless breasts should look pale pink with no gray, no liquid pooling in the package, no strong smell. If the package has more than a teaspoon of liquid in the bottom, it's been freeze-thawed or it's water-chilled — pass.
- Frozen individually-quick-frozen (IQF) bags are the best value. You thaw only what you need and the freezer holds 9 months without quality loss. Stay away from frozen breasts that come pre-marinated; you're paying $4/lb for soy sauce and water weight.
- The "Organic, Air-Chilled" tier from a regional butcher runs $7-10/lb; the conventional Cornish Cross from Costco runs $3-4/lb. Both cook the same way. Spend the difference if the flavor delta matters to you, but don't pretend a $9/lb breast is forgiving — it dries out at the same temperature as the cheap one.
For weeknight cooking I keep a 4-lb bag of IQF organic breasts in the freezer ($24 at Costco, ~16 portions, $1.50/portion) and pull 2-4 the night before to thaw in the fridge.
Brining and dry-brining (the single biggest upgrade)
If you do only one thing on this list, dry-brine. It takes 30 seconds of active work, no special equipment, and the texture improvement is the single largest variable you control after temperature.
Dry brine (preferred):
1. Pat the breast dry with paper towel.
2. Sprinkle ¾ teaspoon of kosher salt per pound, evenly on both sides. (Kosher, not table — the larger crystals are easier to distribute and less likely to over-salt small spots.)
3. Place on a rack over a plate, uncovered, in the fridge for 1-24 hours. 4-8 hours is the sweet spot.
4. Don't rinse. Cook as planned.
The science: salt pulls moisture out of the surface (you'll see beads after ~20 min), dissolves into a concentrated brine, then the meat reabsorbs that brine over the next hour. The salt distributes through the muscle, seasoning evenly and lightly denaturing the proteins so they hold water during cooking. The uncovered fridge time also dries the surface — meaning when the breast hits the pan, it browns instead of steaming.
Wet brine (for grilling or smoking):
- 4 cups water + ¼ cup kosher salt + 2 tbsp sugar, dissolved
- Submerge breasts 1-4 hours (longer = mushy)
- Rinse, pat very dry before cooking
Wet brining adds more juiciness than dry brining but at the cost of pure chicken flavor (the meat takes on the brine's water) and crispier skin (the surface stays wet). For pan-searing and roasting, dry brine wins. For grilling or smoking — where the longer cook time risks drying — wet brine adds insurance.
Skip the brine when: the recipe involves a marinade that already contains a meaningful amount of salt (most marinades do — read the recipe), the breast is going into a saucy braise like Chicken Piccata where the sauce carries the seasoning, or you're cooking in less than 30 minutes from package open.
HowTo: Perfect pan-seared chicken breast in 15 minutes
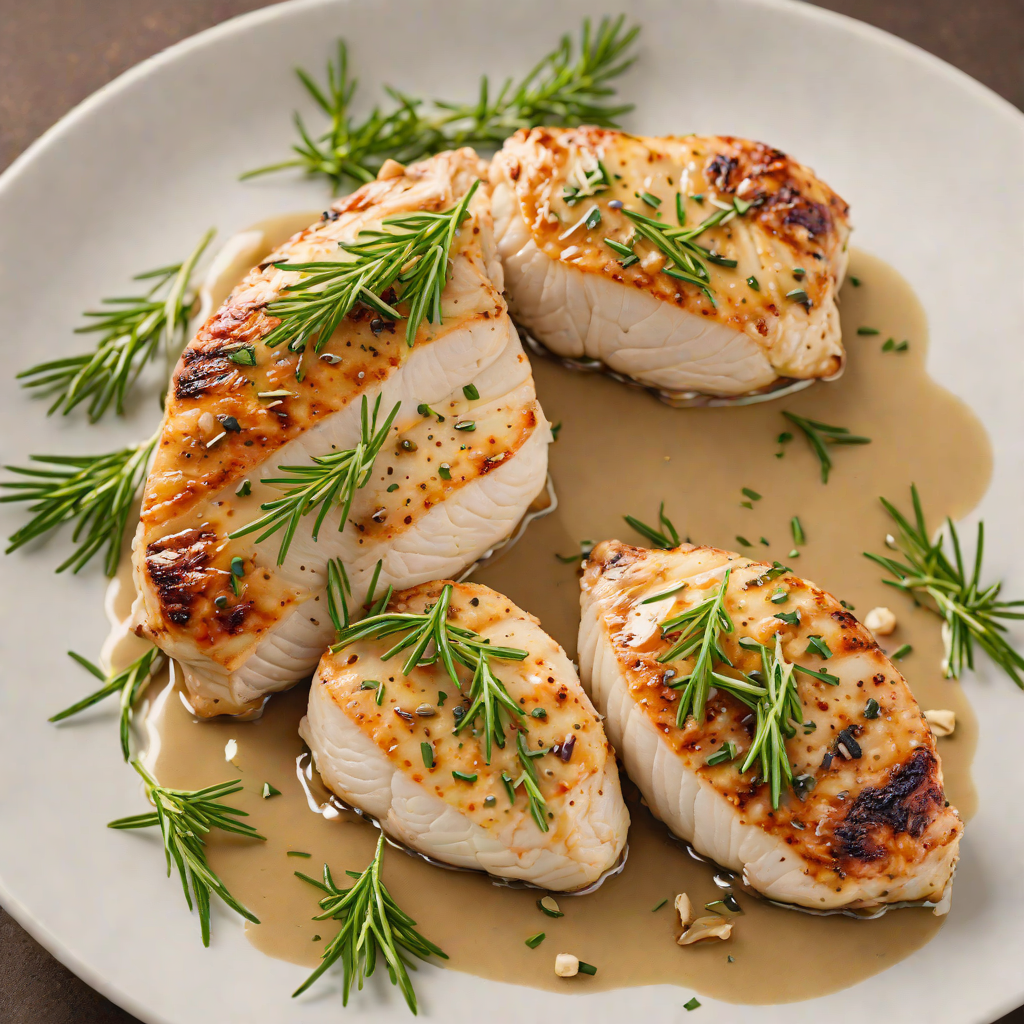
This is the weeknight method. Total time from cold pan to plate is 15 minutes including the rest. For the deeper recipe write-up with sauce variations, see Pan-Seared Chicken Breast with Garlic and Rosemary Pan Sauce.
Equipment: 12-inch cast iron or heavy stainless skillet, an instant-read thermometer, tongs, a sharp chef's knife for portioning.
Ingredients (serves 2):
- 2 boneless skinless chicken breasts (~6 oz each), pounded to ¾"
- ¾ tsp kosher salt (skip if dry-brined)
- ½ tsp black pepper
- 1 tbsp neutral high-smoke-point oil (avocado, grapeseed, or refined olive — not extra-virgin)
- 1 tbsp butter
- 2 sprigs thyme or rosemary (optional)
- 2 cloves garlic, smashed (optional)
Method:
1. Pat the chicken bone-dry. Surface moisture is the enemy of browning. If you brined, pat again after pulling from the fridge.
2. Heat the skillet over medium-high for 3-4 minutes. Add the oil; it should shimmer immediately but not smoke.
3. Lay the breasts in away from you. Don't move them for 5-6 minutes. This is where most cooks ruin it — they fidget. The crust needs uninterrupted contact to form. The breast will release from the pan when it's ready.
4. Flip once. Add butter, herbs, and garlic. Tilt the pan and spoon the foaming butter over the top for 90 seconds.
5. Probe the thickest part of the thicker breast. Pull at 160°F internal. Total cook time is usually 5-6 minutes on the first side, 3-4 on the second.
6. Rest on a board for 5 minutes before slicing against the grain.
If the breast is browning before the inside is up to temp, your pan is too hot — finish in a 350°F oven for 2-3 minutes. If it's overcooked before the outside is brown, the pan was too cold or the breast was too thick — pound thinner next time.
For a complete dinner in the same pan, deglaze with ¼ cup chicken stock and a squeeze of lemon after pulling the chicken, then mount in 1 tbsp cold butter for a 2-minute pan sauce.
HowTo: Baked chicken breast at 425°F
This is the hands-off method. Best for batch-cooking three to six breasts at once for weekly meal prep or feeding a crowd. The deep dive lives in Low-Fat Baked Chicken Breasts with Herbs.
Why 425°F: Lower oven temps (350-375°F) cook the breast more gently but for so long that the surface dries out before the inside hits temperature. 425°F is hot enough to brown the surface fast and pull the breast through the danger zone (140-160°F) in under 10 minutes, then you pull and rest.
Method:
1. Heat oven to 425°F. Line a half-sheet pan with parchment or foil.
2. Pat breasts dry. Rub with 1 tsp olive oil per breast. Season with salt (skip if brined), pepper, and any dry rub. For chicken specifically, I like a 50/50 mix of garlic powder + smoked paprika as a default.
3. Arrange breasts on the sheet pan with at least 1" between them. Crowding traps steam and prevents browning.
4. Bake until the thickest part reads 160°F internal. Times: thin breasts (½") = 12-14 min, medium (¾") = 15-18 min, thick (1"+) = 18-22 min. Start checking at 12 minutes.
5. Rest 5 minutes before slicing.
For a complete sheet-pan dinner, see Sheet Pan Lemon-Glazed Chicken with Roasted Asparagus and Potatoes — same oven, same temp, vegetables go in first because they need longer.
20 curated chicken breast recipes from the catalog
The AislePrompt catalog has 700+ chicken recipes. Below are the 20 I cook on actual repeat, organized by technique. Every link goes to the full ingredient list, step-by-step instructions, and macro breakdown.
Pan-seared & quick-stovetop
- Pan-Seared Chicken Breast with Garlic and Rosemary Pan Sauce — the 15-min default
- Pan-Seared Chicken Breasts with Dijon and Lemon Pan Sauce — bright, weeknight
- Chicken Piccata — capers, butter, lemon; 25 min start to finish
- Pan-Roasted Chicken with Mushroom Marsala Sauce — date-night
- Sautéed Chicken with Garlic and Lemon-Infused Olive Oil — five ingredients, 15 minutes
Baked & roasted
- Low-Fat Baked Chicken Breasts with Herbs — the meal-prep workhorse
- Italian Oven-Baked Chicken Parmesan with Fresh Basil — Sunday dinner
- Maple-Glazed Chicken Breast with Roasted Root Vegetables — fall comfort
- Herb-Crusted Baked Chicken with Lemon and Thyme — minimal-ingredient
Sheet-pan complete dinners
- Sheet Pan Lemon-Glazed Chicken with Roasted Asparagus and Potatoes
- Sheet Pan Maple-Balsamic Chicken with Roasted Vegetables
- Sheet Pan Bacon-Wrapped Chicken Bake with Creamy Garlic Sauce — weekend indulgent
Grilled & skewers
- Grilled Mediterranean Lemon-Herb Chicken — summer go-to
- Pan-Seared Chicken Souvlaki Skewers with Tzatziki — stovetop when grilling isn't an option
- Sumac-Rubbed Chicken Skewers with Lemon Herb Rice — bright, Middle Eastern
Stir-fries & one-pan
- Chicken Stir-Fry — the foundational template
- Black Sesame Chicken Stir Fry with Broccoli — 20 minutes, deeply savory
- Traditional Chinese Kung Pao Chicken — the takeout-killer
- Quick and Easy Mango Chicken Stir Fry — sweet, weeknight
- One-Pot Creamy Tuscan Chicken with Spinach and Sun-Dried Tomatoes — one pan, big flavor
Globally inspired
- Spiced Tequila-Lime Chicken Fajitas — Saturday night
- Lemon-Oregano Greek Chicken Souvlaki Skewers — meal-prep friendly
- One-Pot Lemon Chicken with Asparagus and Cherry Tomatoes — single-pan cleanup
Internal temp and food safety
The FDA, USDA, and every reliable cooking-science source agree: chicken is safe when it reaches 165°F internal in the thickest part. Disagreements start with how to get there.
| State | Internal temp | Safety status | Texture |
|---|---|---|---|
| Raw | <120°F | Unsafe | Translucent, jelly-like |
| Danger zone | 40-140°F | Bacteria multiply rapidly | N/A — keep moving through |
| Just barely safe (sustained) | 145°F for 8.5 min | Safe (pasteurized) | Tender, slightly translucent at center |
| Pull temp (carryover plan) | 160°F | Hits 165°F on rest | Juicy, opaque |
| USDA safe | 165°F instant | Safe | Firm, opaque |
| Overcooked | 170-175°F | Safe | Starts drying |
| Sawdust | 180°F+ | Safe | Fibrous, dry |
The "pull at 160°F" rule is the move. The USDA's own food safety guidance confirms 165°F is the kill point, but it's an instantaneous kill — meaning the moment any part of the meat reaches that temp it's safe. Carryover cooking (the internal temp continues to climb 5-10°F after the chicken leaves the heat) is reliable enough that pulling at 160°F and resting 5 minutes lands you at 165°F across the entire breast with no overshoot.
If you don't trust carryover (uneven heat sources like grills, or very thin cuts under 1/2"), pull at 162°F. If you're cooking sous vide, you can hold at 145°F for 30+ minutes and reach the same pasteurization level — the USDA's pasteurization chart walks through the time/temp tradeoffs in detail.
The thermometer is the single best $25 you can spend on cooking. A ThermoWorks Thermapen or any reliable instant-read reads in <2 seconds and turns chicken from a guessing game into engineering. The "press it and see if it springs back" or "cut into it and check for pink juices" methods are unreliable enough that food-science publications like Serious Eats have written entire pieces on why those cues lie — color can stay pink at 175°F (myoglobin-related, not safety-related), and juice color depends on the bird, not the doneness.
Storage and leftovers
Cooked chicken breast keeps 3-4 days in the fridge at 40°F or below in an airtight container. The clock starts the moment the chicken hits the fridge, not when you cooked it. Day 4 is a hard cutoff — freeze anything you won't eat by day 3.
Refrigerator storage:
- Slice or shred before storing if you'll use it in salads/wraps. Whole breasts stored sliced are easier to reheat without overcooking.
- Add a tablespoon of chicken stock or olive oil to the container — keeps the surface from drying out.
- Label with date. The "I'll remember" approach loses every time.
Freezer storage:
- Cool to room temp first (don't freeze hot food — raises freezer temp and ruins everything around it).
- Wrap individual portions tightly in plastic, then foil, OR vacuum-seal. Air contact is the enemy.
- Freeze flat in a single layer until solid, then stack — speeds thaw later.
- Good for 3 months at consistent 0°F. Quality (not safety) degrades after that.
Reheating without ruining the texture:
- Microwave: 50% power, 90 seconds, flip, 60 more. Full power for 30+ seconds turns chicken rubbery — proteins re-contract and squeeze out water.
- Skillet: medium-low, splash of water or stock, cover with lid. 4-5 minutes turning halfway.
- Oven: 325°F, splash of stock in the bottom of the dish, cover with foil. 10-15 minutes for a single breast.
- Cold: Slice and add to salads, wraps, grain bowls — leftover chicken is actually better cold than rewarmed badly.
Kitchen tools that help
You don't need a wall of gadgets. You need four things.
- An instant-read thermometer (our thermometer picks) — the single tool that fixes 80% of chicken-breast failures. ThermoWorks Thermapen is the gold standard at $99; the ThermoMaven and ThermoMonster clones at $30-40 are 90% as good.
- One heavy 10-12" skillet (cookware category) — cast iron (Lodge 12" at $30) or tri-ply stainless (All-Clad D3 at $200, Misen at $90). The thin nonstick skillet that came with your apartment can't hold sear-temperature heat when you add cold chicken.
- A sharp 8" chef's knife (knives category) — for pounding (use the flat of the blade), butterflying, and slicing against the grain after rest. A dull knife tears the meat and squeezes juice out.
- A heavy-duty rimmed half-sheet pan (cookware category) — Nordic Ware Naturals is the standard. Cheap warped pans pool fat and cook unevenly.
Skip: meat mallets (the flat of a chef's knife or a heavy glass jar works fine), chicken-specific shears (most kitchen shears handle a breast), single-purpose chicken-cooking gadgets.
Common pitfalls
Five mistakes that turn good chicken bad:
1. Crowding the pan. Steam can't escape; meat braises instead of sears. Cook in batches if you have to.
2. Flipping every 30 seconds. The crust never forms. One flip, total.
3. Cutting in to "check doneness." Releases juice you can't put back. Use the thermometer.
4. Skipping the rest. Cut a breast straight off the heat and a third of the juice runs onto the cutting board. Rest 5 minutes.
5. Trusting the package weight as one portion. "Boneless skinless chicken breasts" from a US supermarket frequently weigh 10-12 oz each — that's 1.5 servings, not 1. Portion before cooking so you don't overshoot.
Frequently asked questions
What's the secret to chicken breast that isn't dry?
Should I pound chicken breast before cooking?
What temperature is chicken breast safe at?
How long does cooked chicken breast keep in the fridge?
Is chicken breast or chicken thigh better?
Sources
Recipes to start your week with
Save any of these to My Recipes — no account needed — and send the ingredients to Instacart in one tap.